

Canon Camera Connect app: how well does it work?
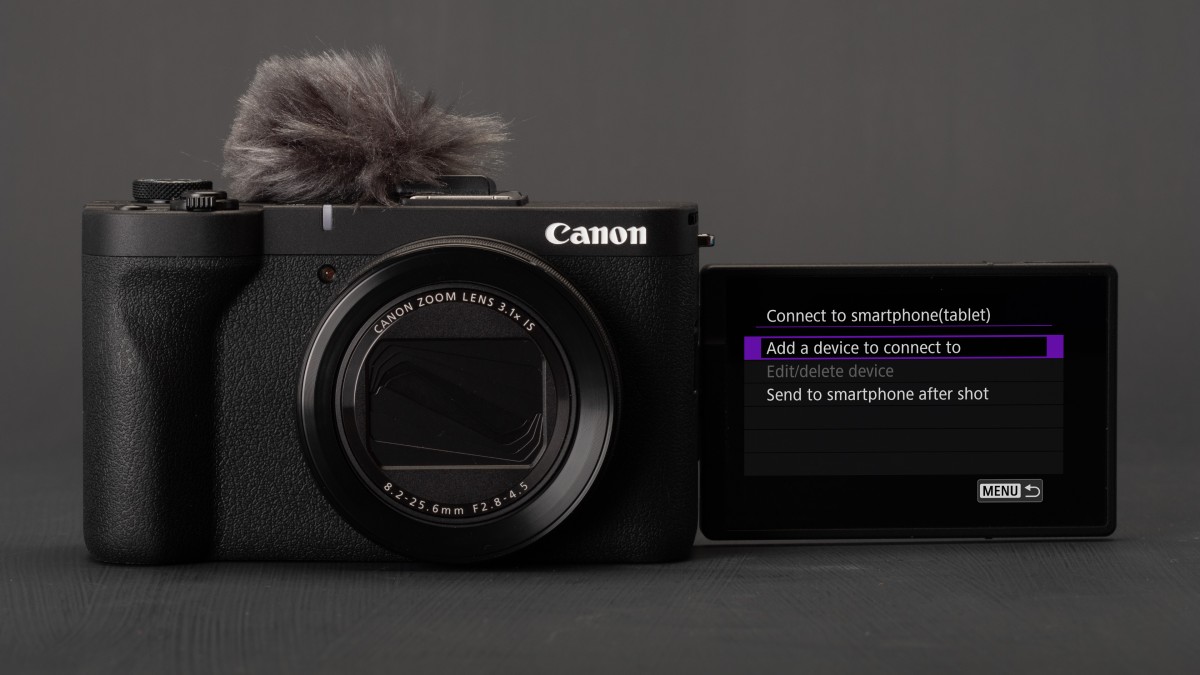
We explored Canon’s connectivity app on both iOS and Android, to see how it behaves
 Richard Butler
Easy smartphone connection is one of the most asked-for features we hear when talk to people about cameras, so we thought we’d investigate the current state of all the brands’ apps. Beyond a few frustrations, we found Canon’s Camera Connect to be one of the better options, at least with the recent cameras we had available to test.
Getting started
Before you can even use Canon’s Camera Connect app, you need to create a “Canon ID” using an e-mail address and password, which can be frustrating: it’s not entirely clear what benefit there is to the user of this. The app will also regularly ask you if you wish to register your camera with your Canon ID and will then remind you that you can do so, even if you say No. There’s no ‘do not show this message again’ option.
 Richard Butler
To first connect the camera, you need to select your camera model from the app’s list of available models. This helps, in that it means the app should be able to guide you through the appropriate workflow for your camera model.
Connecting the relatively recent PowerShot V1 to an Android phone was a case of using the displayed QR to download the app then starting the pairing process from the camera. With the app open and the camera trying to establish a connection, a pop-up box with the camera’s ID appeared on the app, letting me confirm Bluetooth pairing. I then had to confirm on the camera, too, then was good to go.
 Open the app and initiate the pairing process from the camera and your camera’s ID should pop up on the app.Richard Butler
 Once paired, the app’s homescreen gives you the option to import images or engage live view shooting.Richard Butler
Once the two devices were paired, it was just a case of opening the app and waiting for a bluetooth connection to be established. As soon as the bluetooth icon lights up in the app, you get the choice of importing images from the camera or to engage live view remote shooting.
Wi-Fi connectivity
Selecting either of these options tells the camera to turn its Wi-Fi on, and after a few moments the phone asks permission to connect to the Wi-Fi network the camera has established. Click ‘Connect’ and it establishes a connection fairly quickly.
 The Android app will ask your permission to connect to the camera’s Wi-Fi network, when you’re first pairing them.Richard Butler
 The iOS version of the app asks for permission to connect to the camera’s Wi-Fi network every time you re-establish a connection.Richard Butler
On iOS you have to approve the network connection each time you re-establish a camera-to-phone Wi-Fi connection, whereas Android is happy to trust it, once you’ve given it permission the first time.
 sThe Images on camera option shows all the images on your camera’s storage card, and lets you filter by date or file type. The Apple version of the app lets you download JPEGs, HEIFs or Raws. The Android version is JPEG only. Richard Butler
The “Imaged on camera” option, once the Wi-Fi connection has been established, shows all the images currently on the camera’s card. On Android, you can only import JPEGs, and the camera will generate a JPEG if you try to import a Raw file. On iOS, the app is happy to transfer JPEG, HEIFs or Raws, probably because all three file types are supported by Apple’s operating system, so it knows what to do with the files. If you try to import an HDR HEIFs using the Android app it’ll tell you you have to manually convert the HEIF to a JPEG (and drop down to SDR) on the camera, first.
Remote live view shooting
Engaging remote live view shooting is a similar process: pressing the button in the app initiates a Wi-Fi connection that you’ll need to approve each time on the iOS version. You’re then given a live feed from the camera with an interface that lets you control a lot of the camera’s settings.
 Richard Butler
You can adjust exposure settings, drive mode, AF mode, white balance and so forth. You can’t change exposure mode, though or, at least, not on a camera whether that’s set using a physical dial. You don’t get fine-grained control like WB fine tune and some functions can be greyed-out for reasons that aren’t obvious.
 Richard Butler
Although not enabled by default, you can set the app to let you double-tap to zoom in the live view display to the area around the AF point. With this done, the manual focus function that lets you drive the focus forward or backward with three degrees of subtlety becomes much more useful, though the zoom only punches in to the 5x level of zoom, not the really fine 10x option you can get on the camera’s rear screen.
 Richard Butler
Taking photos in live view shooting mode does not transfer them to the camera: you’ll need to leave the live view shooting option and switch back to the “Images on camera” function. You can review your images and even give them a rating, but that’s it.
Further functions
Away from the App’s Home tab is another called “Functions,” which will show the other modes and functions available with whichever camera you currently have connected.
 Richard Butler
So, for example, most cameras have an Auto Transfer option, that lets you automatically send images from your camera to your phone, as you take them. With this function you have the choice of whether to downsize the files (to 1MB 1620 x 1080px files) before transfer and the option to remove location data from the transferred images.
This mode only continues to function while a Wi-Fi connection is maintained and the Auto Transfer function is still active in the app. Auto Transfer can’t be used in conjuction with the live view shooting mode, frustratingly. Auto Transfer can’t send Raws and won’t send HDR PQ HEIFs, either.
Also in the Functions tab are a ‘Bluetooth remote control’ function, an option to share the smartphone’s location data with the camera, to add it to images as you shoot them, and the ability to send your phone’s date and time to the camera, with the option to update these settings every time you reconnect the app. This last feature sounds especially useful when traveling across time zones.
 You can share your phone’s time and date to your phone. Handy for travelRichard Butler
 You can also share your phone’s location info to your camera, which it then embeds in the EXIFRichard Butler
There’s also the option to set your camera up to connect to local Wi-Fi networks, which then lets you engage its Cloud upload and Live Streaming features. You can also do this from the camera itself, but it’s likely to be easier to find and connect to Wi-Fi networks from the app in your phone, rather than having to navigate an on-screen keyboard in the camera’s menus.
Newer cameras may include the option to download Custom Picture color profiles for video from Canon’s LUT library. This downloads standard .cube LUTs to your phone, from where you can push them to your camera. Via a rather convoluted process, you can then save these LUTs into one of the Custom Picture slots in your camera and save them to the SD card to simplify the process in future.
The final option in a link to the camera’s online instruction manual. The precise behavior may depend on how your local Canon subsidiary uploads its manuals, but in the US, at least, you get the choice of the user manual as html pages or in pdf form.
USB connection
What really sets Camera Connect apart from many other manufacturer apps is the ability to connect the two devices directly with a USB cable. Canon’s recent cameras have a “Choose USB connection app” menu option at the end of their network settings menu. Android users can leave it in the default “Photo Import/Remote Control” setting, whereas Apply users will need to select “Canon app(s) for iPhone.”
 Both the Android and iOS versions of the app can make direct connections over USB, but you have to set the camera to a special USB mode to work with an Apple phone.Richard Butler
Once this is set, connecting a cable between the devices lets you jump straight into features such as image import, live view control or auto upload, that usually require a Wi-Fi connection. The Android version even asked whether you want Camera Connect to be automatically opened, when you connect your camera.
 Simply connecting the phone and app using a USB cable will let you use most of the modes that usually require a Wi-Fi connection. Only faster, and with none of the hurdles of pairing.Richard Butler
This USB route is much faster than Wi-Fi and doesn’t require any pairing in advance. The camera doesn’t need to recognize the phone and you won’t need to select which phone to connect to, if you have more than one pairing registered: you just plug in and go. Even with a USB connection, the Android app won’t let you transfer Raws.
Other Apps
Finally, beyond the Functions tab, the Camera Connect app has an ‘Apps’ tab that lets you download Canon’s other smartphone apps, including its Selphy printing app and the EOS Webcam Utility Pro app.
 You’ve done something. Would you like to register your camera with your Canon ID?Richard Butler
 Are you sure? You can do it later if you like. But what you can’t do is stop the app asking you. Constantly.Richard Butler
Each time you open the app, it connects to Canon’s servers and checks for firmware updates for the currently active camera model. If an update is available, the app can show you the change log and let you download the firmware to your phone. It’ll then establish a Wi-Fi connection to the camera to transfer the firmware update file.
Only once that file has transferred completely to the camera are you asked if you want to update the firmware, so you don’t have to worry about connection status during the update.
Want to stay up to date on the latest product news and releases? Add DPReview as a preferred source to ensure our independent journalism makes it to the top of your Google search results.
What's Your Reaction?
 Like
0
Like
0
 Dislike
0
Dislike
0
 Love
0
Love
0
 Funny
0
Funny
0
 Wow
0
Wow
0
 Sad
0
Sad
0
 Angry
0
Angry
0









Comments (0)