

Photoshop Just Replaced Brightness and Contrast With Something Better
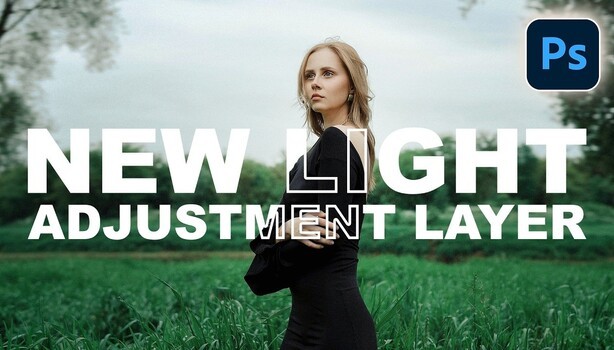
Photoshop's Brightness/Contrast slider is gone, replaced by a new Light adjustment layer that pulls Camera Raw controls straight into the main editor. Exposure, contrast, highlights, shadows, whites, and blacks now live in a single panel that behaves like a nondestructive version of the Camera Raw sliders many of you already trust.
Aaron Nace of PHLEARN walks through the layer and lands on a strong recommendation: skip the old Brightness/Contrast algorithm entirely. He explains that the Light layer is the newest arrival in a growing line that already includes Grain, Clarity, Dehaze, and Color. If you preferred the old behavior, double-click the Light layer, open the small hidden menu on the right side of the Properties panel, and switch the version to "Legacy." That brings Brightness/Contrast back exactly as it was, so nobody loses the tool they built their workflow around.
Slider order carries real weight here, and Nace lays out the sequence he uses every time: exposure first, then whites and blacks, then highlights and shadows, and contrast dead last. He also stresses masking. By default, a Light layer affects the entire frame, so he starts with Select Subject on the background layer before creating the adjustment, which turns the selection into a mask automatically. From there he inverts the mask with Command or Control plus I to work the background separately, dropping exposure to push the subject forward and lifting the whites to pull detail back into the sky. He repeats the process on a second Light layer for the subject alone, keeping each adjustment isolated and fully reversible.
The glow effect is where the tutorial earns a closer look. Nace stacks a third Light layer, groups it with itself using Command or Control plus G, then adds a mask to the group and paints in a radial gradient behind the figure. That double-mask trick, one on the layer and one on the group, is the part worth watching him do slowly, because the logic behind why it works is easy to lose if you only read the steps.
This shift fits a pattern Adobe has been running for a while now. Camera Raw and Lightroom have long been the home for exposure and tone work, and Photoshop is steadily absorbing those same controls as editable layers. If you shoot in raw and process there before opening a file, the Light layer lets you keep that same mental model instead of switching tools halfway through an edit. The bigger takeaway is the masking discipline itself: isolating exposure and tone to specific regions, subject versus background, is the same principle behind classic dodge and burn, and it transfers to any adjustment layer in the panel. Learn it on Light and it pays off on Color, Curves, and everything else. One quirk to expect: when you edit a layer beneath a Light layer, Photoshop temporarily hides the Light layers above it so you can see the raw effect you're adjusting. Nace demonstrates this with Grain, and it looks like a bug until you understand Adobe built it on purpose.
He also spends time on the Color layer, which brings temperature, tint, and vibrance sliders into the same nondestructive workflow, warming the image and nudging the tint toward green to match the tones already in the scene.
Watch the full breakdown above to see Nace build the background glow and reveal the two-mask setup step by step.
What's Your Reaction?
 Like
0
Like
0
 Dislike
0
Dislike
0
 Love
0
Love
0
 Funny
0
Funny
0
 Wow
0
Wow
0
 Sad
0
Sad
0
 Angry
0
Angry
0







Comments (0)