Your Layer Mask Isn't the Problem: Here's What Actually Causes Hair Fringing
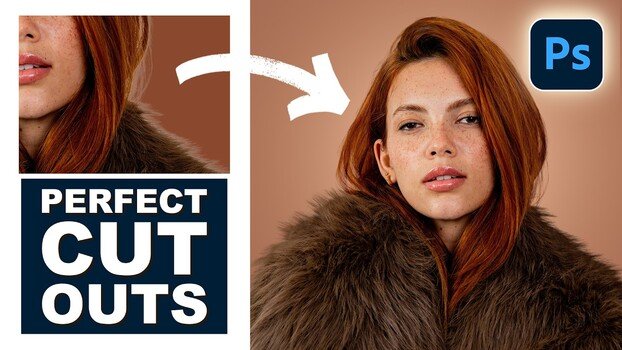
Fringing around hair and fur is one of the most stubborn problems you'll run into when cutting out subjects in Photoshop. No matter how clean your layer mask looks, switching to a new background can expose a halo of the original background color that ruins the shot.
Coming to you from Phlearn, this practical video from Aaron Nace walks through exactly how to eliminate that fringing using Photoshop's clipping mask feature combined with the clone stamp tool. The core insight here is something most people get wrong: the fringing is not caused by a bad layer mask. Nace demonstrates this by zooming into the mask itself and showing that it's actually clean. The real problem is that the pixels at the edge of your subject still carry color data from the original background, and a layer mask alone can't fix that. Clipping masks give you a way to paint or clone new detail that stays contained within the boundaries of your subject layer, which is what makes this technique work.
The workflow starts simple. Nace creates a new layer above the masked subject layer, clips it to that layer using Alt/Option-click between the two layers in the Layers panel, and then uses the clone stamp tool set to "Current and Below" to sample hair from inside the subject and paint outward toward the edges. Because the new layer is clipped, anything painted outside the subject's boundaries stays invisible. The result is that fringe pixels get replaced with actual hair or fur detail sampled from the subject itself, and the edge looks natural against any background color. He also shows that you can stack multiple clipped layers, which keeps the work non-destructive and organized.
What makes this more useful than a typical masking tutorial is the section on dealing with curved or directional hair. When you're working along a curve, cloning straight across doesn't match the flow of the hair. Nace's solution is to clone the hair onto a separate layer, move it into position with the move tool, and then use the Warp transform to bend it so it follows the curve of the original. That warped layer gets clipped to the subject just like the others, and the result fits seamlessly. It's a small but genuinely clever workaround for a situation that would otherwise require a lot of painful manual brushwork. He also covers using the brush tool as an alternative to the clone stamp for areas where you just need to fill in color rather than replicate texture, and explains when each approach makes more sense. Check out the video above for the full walkthrough from Nace.
What's Your Reaction?
 Like
0
Like
0
 Dislike
0
Dislike
0
 Love
0
Love
0
 Funny
0
Funny
0
 Wow
0
Wow
0
 Sad
0
Sad
0
 Angry
0
Angry
0


Comments (0)