

Five Ways a Single V-Flat Can Fix Your On-Location Lighting
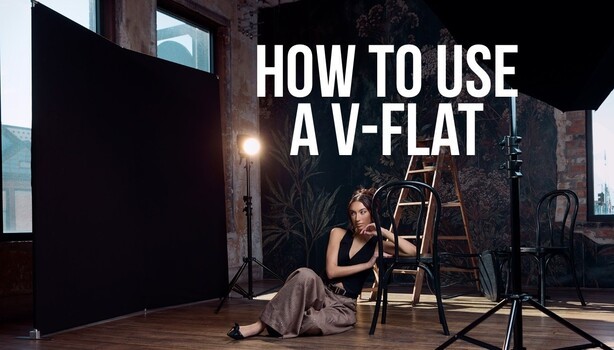
A single black-and-white board can do the work of a reflector, a flag, a backdrop, and a negative fill panel, all in the same shoot. Learning to read light and shape it with one tool beats buying five separate modifiers.
Ashley from Westcott Lighting walks through five distinct ways to use the Westcott V-Flat on location, starting with the most common: bouncing light. Faced with beautiful but harsh window light, she moved her subject just out of the direct sun and brought the white side of the board in close to catch and redirect that window light. That reflected light became her key, softer than the raw sun and delivering large, flattering catch lights in the eyes. The rule she leans on is simple: the closer the board sits to the subject, the more light it throws back. Pull it in tight and a passive white surface behaves like a proper key light.
From there she flips the board to its black side for flagging and negative fill. Blocking a window with the black fabric gave her a clean pocket of shade to work in while the light still lived in the background for texture, and she filled that pocket with an FJ400 version 2 firing into a 53-in deep umbrella, plus an FJ800 with a warm gel as a hair light. Negative fill is the more advanced move. By pushing an FJ400 through a large scrim she got soft, even light that read a little flat on its own, then placed the black side of the board close to the subject to absorb light out of the shadows. That darkening defined the cheekbones and jawline and added contrast without touching the softness of the source.
Negative fill is the technique most people skip, and it's the one worth practicing first. Soft light is easy to buy now. Large modifiers, big scrims, and powerful strobes are cheaper than they've ever been, and the result is a wave of portraits that look clean but weightless, with no shadow structure to anchor the face. Subtraction is how you get that structure back. A black surface near the shadow side of a face cuts the ambient bounce that fills those shadows in, so the transition from light to dark steepens and the bone structure reads. This costs nothing in power or gear, works in a bright room or a dim one, and gives you a contrast control that no amount of adding light can replicate. Once you start thinking about what to take away instead of only what to add, your lighting gets a lot more precise.
The final two uses turn the board into part of the set itself. Ashley used the black fabric as a clean backdrop behind a subject to hide a cluttered room, then aimed a gelled FJ800 at the fabric to build a subtle gradient so the background didn't go dead flat. The last setup layers both fabrics on the frame at once: black first to shield the subject from spill, white on top as a bounce surface for two strobes pointed into its center, producing an even high-key white backdrop while a 24-in rapid box beauty dish keeps the key light on the subject directional and defined. One board doing two jobs in a single frame.
Watch the full breakdown in the video above to see each setup lit and shot from start to finish.
What's Your Reaction?
 Like
0
Like
0
 Dislike
0
Dislike
0
 Love
0
Love
0
 Funny
0
Funny
0
 Wow
0
Wow
0
 Sad
0
Sad
0
 Angry
0
Angry
0





Comments (0)