

How to Edit Harsh Midday Sun in Lightroom Classic
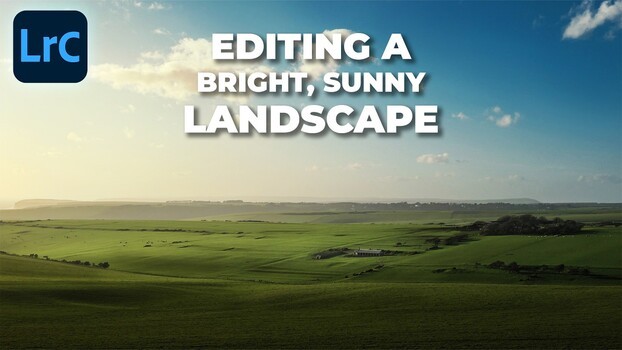
Editing a landscape shot in harsh midday sun sounds like a losing battle, yet you can pull a flat, overexposed frame into something with depth and direction. The trick lives almost entirely in your masks.
A recent Tutorial Tuesday from Gareth Evans Park Cameras walks through exactly this problem, with Evans taking a daytime landscape shot with the sun still high and reworking it in Lightroom Classic. The starting image sits in that awkward middle ground where bright sun creates both patches of hard contrast and stretches of flatness at the same time. Evans opens with a 16 by 9 crop to fit the scene and set a farmhouse as the clear subject, keeping enough sky to hold the clouds that give the frame some interest. From there come small global moves: a touch more contrast, a healthy bump in clarity to recover foreground detail, a little vibrance, and highlights pulled down slightly before the real work begins.
Most of the lighting gets shaped with masks rather than global sliders. Evans brings in a linear gradient from the bottom to darken the foreground and push the eye upward, then layers radial gradients across the middle of the landscape and over the farmhouse to make that spot the brightest point in the frame. The sky gets its own treatment through a linear gradient from the top right, intersected first with a sky selection and then with a color range set to the blue, so the darkening stays behind the clouds and builds contrast up top. A separate radial gradient warmed up with negative dehaze mimics sunlight spilling across the land. This is dodging and burning by another name, which is a useful way to think about what these tools actually do.
The approach here reflects a wider shift in how editing happens now. For years, the serious tonal control you see in this video meant taking a file into Photoshop and painting on layers by hand. Lightroom's masking has closed most of that gap, and the AI-driven selections for sky, subject, and color range mean you can isolate parts of an image in seconds that used to take careful manual work. The principle worth carrying into your own edits is that light, not color, does the heavy lifting. When you decide which areas to brighten and which to sink into shadow, you are directing where a viewer looks before they ever register the scene. That habit of asking "where do I want the eye to go" and then building masks to answer it applies to portraits, interiors, and street work just as well as it does to a field and a farmhouse.
The file in this edit is a JPEG, and he points out more than once where the image starts to "come apart at the seams," particularly in the blue sky, as the adjustments pile up. A raw file would take the same treatment without complaint. If you shoot in bright sun and know you will be pushing exposure and contrast around later, capturing raw gives you the room to work that a JPEG simply doesn't. It's an honest reminder woven through a tutorial that could easily have pretended the format didn't matter.
The back half of the edit brings in brush work and Lightroom's adaptive presets. Evans paints over shadow areas with auto mask enabled to deepen them, then brushes light back into the farmhouse and a few brighter patches, holding Alt to erase where it goes too far. He leans on adaptive subject and adaptive landscape presets, which read the actual contents of the frame and adjust the sky, foreground, and subject accordingly, then dials the strength back to around 67 so the look never overwhelms the photo. A final pass through the color mixer lifts the luminance of the blue sky while easing its saturation to keep it rich without breaking apart. The before and after tells the story better than any slider count, and he leaves plenty of the reasoning behind each choice for you to pick up as you watch.
Press play on the video above to follow Evans' full mask-by-mask build and see how a flat sunlit frame turns into a directed, dimensional landscape.
What's Your Reaction?
 Like
0
Like
0
 Dislike
0
Dislike
0
 Love
0
Love
0
 Funny
0
Funny
0
 Wow
0
Wow
0
 Sad
0
Sad
0
 Angry
0
Angry
0







Comments (0)