Portrait Photography for Beginners: Settings, Lenses, and Posing Basics
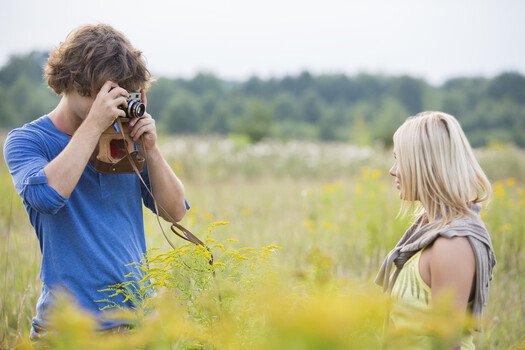
The fastest way to make better portraits is not to buy a flash, a softbox, and three light stands. It is to learn to see and shape the light you already have. Natural light is free, it is forgiving once you understand it, and it teaches you the fundamentals that every lighting setup later builds on. This guide covers the gear, the camera settings, and the posing and light-shaping basics that get a beginner from snapshots to real portraits, all without a single strobe.
Why Start With Natural Light
Flash is powerful, but it adds a stack of new variables at the exact moment you are still learning the old ones. Power levels, sync speed, modifiers, light placement, and the relationship between flash and ambient exposure are a lot to juggle when you have not yet learned to read the light falling on your subject's face.
Natural light removes all of that. What you see is what you get, so you can concentrate on the things that actually make a portrait work: where the light comes from, how soft or hard it is, and how your subject is positioned within it. Master those with free light, and flash becomes a tool you add to a foundation you already have rather than a crutch you lean on before you are ready. We will come back to flash at the end, because it genuinely is the right next step, just not the first one.
The Lens
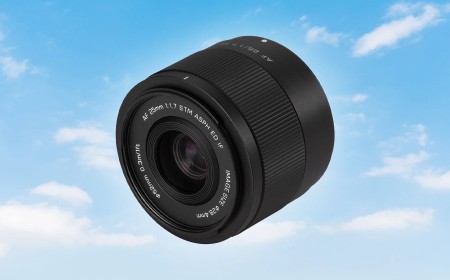
You can shoot a competent portrait with the kit lens that came with your camera, especially at its longest end. But the single most impactful upgrade for portraits is a fast prime, because the wide aperture gives you the soft, blurred background that separates your subject from clutter and signals "portrait" to the eye.
Two focal lengths dominate this work. On a full frame camera, the 85mm prime is the classic portrait lens: it gives a flattering perspective and compresses the background pleasantly, and you stand far enough back to keep your subject comfortable. The 50mm is the versatile budget entry point, excellent for half-length and full-length shots and far easier on the wallet. On an APS-C or crop sensor body, the math shifts: a 50mm frames like roughly a 75 to 80mm, landing it right in the portrait sweet spot, so a nifty fifty is often the smartest first portrait lens a crop shooter can buy.
Here is where to start by system, all of them fast, affordable, and beginner-friendly:
- Canon RF: The Canon RF 50mm f/1.8 STM is the obvious first prime. When you want a dedicated short telephoto, the Canon RF 85mm f/2 Macro IS STM is the most affordable first-party portrait option, and its image stabilization and close-focusing macro ability make it unusually versatile for the price. Canon's licensing restrictions have kept most third-party autofocus primes off the RF mount, so on this system, sticking with native glass is the practical route for a beginner.
- Sony E: The Sony FE 50mm f/1.8 is the budget standard, and the Sony FE 85mm f/1.8 is a genuinely excellent short telephoto that punches well above its price.
- Nikon Z: The NIKKOR Z 40mm f/2 is a light, cheap, sharp starting point, and the NIKKOR Z 85mm f/1.8 S is the step-up portrait lens when you are ready.
- Fujifilm X: The Fujifilm XC 35mm f/2 frames like a 50mm equivalent and is an inexpensive, capable first portrait lens on the X system.
You do not need the most expensive option in any of these. As one rule of thumb worth internalizing: if you are a hobbyist, buy the affordable prime and put the money you save toward learning and light-shaping tools.
The Settings
Portrait settings are simpler than beginners fear. Start here and adjust as you go.
- Aperture: Shoot wide, but not always wide open. An aperture around f/2 to f/2.8 gives you that creamy background separation while keeping enough depth of field that both eyes land in focus. Shooting at the very widest setting, like f/1.8, on a single subject can leave one eye sharp and the other soft, so save the extremes for when you have the focus discipline to use them. For two or more people, close down to f/4 or f/5.6 to keep everyone sharp.
- Shutter speed: Keep it fast enough to freeze small movements, at least 1/200 second for a still subject, faster if anyone is moving. The old reciprocal guideline says to keep your shutter speed at or above one over your focal length, but on a crop-sensor body you should use the effective focal length, the focal length multiplied by the crop factor (1.5 for Nikon and Sony APS-C, 1.6 for Canon). A 50mm lens on an APS-C body, for instance, wants roughly 1/75 second or faster just to counter your own handshake, before you even account for subject movement.
- ISO: Set it to auto with a sensible ceiling and let it float to keep your shutter where you want it. A grainy photo you can fix; a blurred one you usually cannot.
- Focus: Use single-point or eye-detection autofocus and put the point on the near eye. Sharp eyes are non-negotiable in a portrait; everything else can be slightly soft and the image still reads as successful.
- White balance: Auto is fine if you shoot raw, since you can adjust it later without penalty. In open shade or on overcast days, a slightly warmer setting keeps skin from going cold and blue.
Reading and Shaping the Light
This is the part that separates a portrait from a photo of a person. Get a handful of ideas right and you are most of the way there.
Soft light flatters. Hard, direct midday sun creates harsh shadows under the brows and nose and makes people squint. Soft light, the kind you get in open shade, on an overcast day, or near a large window, wraps gently around the face and is far more forgiving. When in doubt, move your subject out of direct sun and into the shade.
Direction matters more than quantity. Light coming from the side carves shape and dimension into a face. Light from slightly above and to one side, the classic flattering setup, gives you natural modeling. Flat light straight from the front is the least interesting. Window light is the single best natural-light tool a beginner has: position your subject a few feet from a window, turn them slightly toward it, and you have a soft, directional key light for free.
Watch the catchlights. The little reflections of the light source in your subject's eyes bring a portrait to life. If the eyes look dead and flat, reposition until you see catchlights.
The One Accessory Worth Buying: A 5-in-1 Reflector
If you buy one light-shaping tool before any flash, make it a 5-in-1 reflector. It is cheap, folds flat, and does more for natural-light portraits than almost anything else at the price.
The "5-in-1" refers to its surfaces. The white side bounces soft, neutral fill light into shadows. The silver side throws a brighter, punchier fill. The gold side adds warmth, useful for a sunset glow. The black side is the one beginners overlook: instead of adding light, it subtracts it, deepening shadows on one side of the face to add drama and shape (photographers call this negative fill). And the translucent center panel, with the cover removed, becomes a diffuser you hold between the sun and your subject to turn harsh direct light into soft light on the spot.
In practice, the most common use is simple. Your subject faces the window or the open sky, the lit side of their face is bright, and the shadow side falls off too dark. Hold the white or silver side of the reflector on the shadow side, angle it to bounce light back into that shadow, and the face balances out. One inexpensive disc, one helper or a stand to hold it, and your portraits immediately look more professional.
Posing Basics
You do not need a hundred poses. You need a handful of reliable corrections that fix the things that make people look awkward.
- Angle the body, not the lens. Have your subject turn their shoulders slightly away from the camera rather than squaring up to it. A straight-on stance looks stiffer and stilted; a slight turn looks more natural.
- Create separation at the arms. Arms pressed flat against the torso look stagnant. A small gap, a hand on a hip, in a pocket, or resting on something, defines the waist and relaxes the pose.
- Lead with the forehead. Have your subject extend the forehead toward the camera while dropping the chin a hair. It feels unnatural to them, but it stretches the jawline and erases any hint of a double chin. "Reach your forehead toward me, then tuck the chin a touch" is all you need to say.
- Give the hands a job. Idle hands look tense. Holding a coffee cup, adjusting a collar, or touching the hair gives them purpose and the whole body relaxes.
- Watch the shift. Shifting weight onto the back foot creates a natural, relaxed line through the body, especially for standing full-length shots.
- Keep the eyes engaged. Talk to your subject. The best expressions happen between the posed moments, so keep shooting through the conversation, not just on "ready."
The Next Step: Adding Flash
Once you can consistently read window light, place a subject in open shade, and balance shadows with a reflector, flash is the natural next move, not because natural light stops working, but because flash gives you control that nature does not. You can shoot at any hour, overpower harsh sun, and shape light exactly where you want it. A single off-camera flash and a softbox, used to mimic the soft, directional window light you already learned to love, is the standard first lighting setup, and it will feel intuitive precisely because you spent this whole time learning what good light looks like first.
If you want to go deeper, Fstoppers has tutorials that pick up exactly where this leaves off. For the posing, expression, and connection side of portraiture, Peter Hurley's Perfecting the Headshot is a foundational resource. When you are ready to make that jump from natural light to controlled lighting, Illuminating the Face: Lighting for Headshots and Portraits walks through the setups step by step. And The Well-Rounded Photographer: 8 Instructors Teach 8 Genres of Photography is a strong choice if portraits are one of several genres you want to grow into.
Start with the light you have. Learn to see it, shape it with a reflector, and pose your subject within it. Do that well, and you will have built the foundation that every flash, every studio, and every advanced technique stands on.
What's Your Reaction?
 Like
0
Like
0
 Dislike
0
Dislike
0
 Love
0
Love
0
 Funny
0
Funny
0
 Wow
0
Wow
0
 Sad
0
Sad
0
 Angry
0
Angry
0


Comments (0)