

Ganondorf's Castle dungeon walkthrough in Ocarina of Time
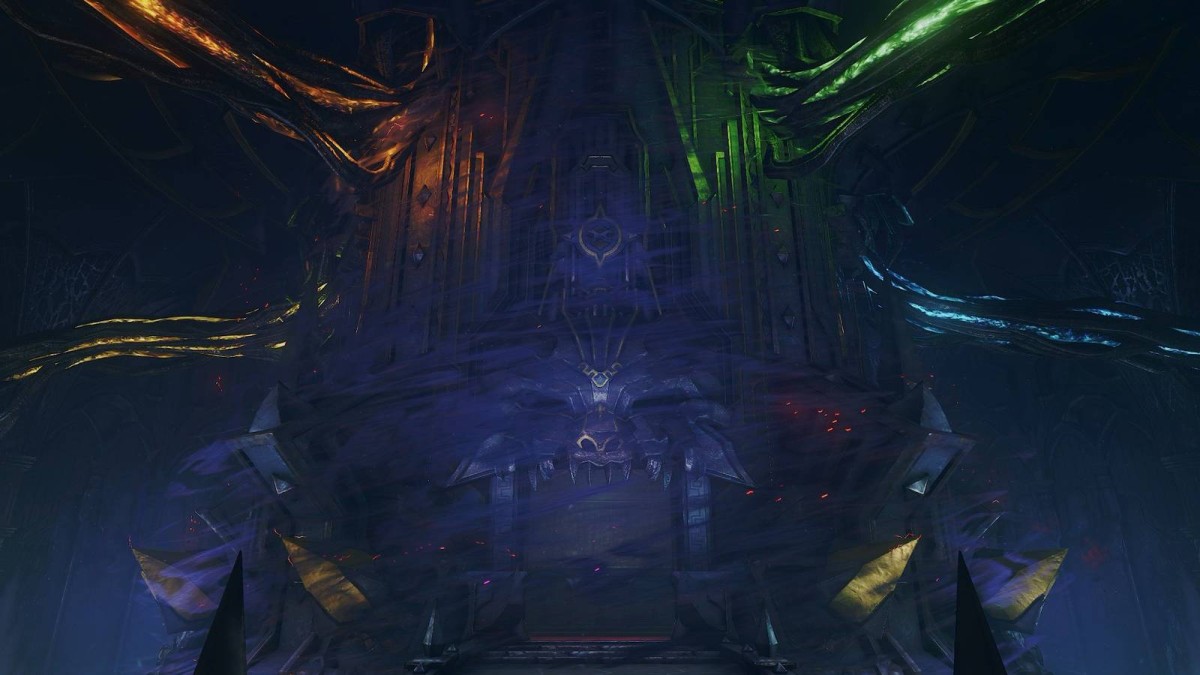
Ganondorf's Castle is the final dungeon in The Legend of Zelda: Ocarina of Time remake, and you'll need to use everything you've learned from the previous dungeons to reach Ganondorf and save Princess Zelda.
There will be six rooms, with each one representing one of the elements. You'll need to solve the puzzle in each room in order to destroy the barrier protecting the central tower. However, the puzzles can get a bit tricky, and you might need a refresher on how some mechanics work.
Here's howw to complete Ganondorf's Castle and defeat him once and for all.
Part 1: Breaking the Shadow barrier
Head into Ganondorf's Castle, which used to be Hyrule Castle, and blow up the two Beamos down the hall. Head through the door, and you'll enter the main room inside Ganondorf's Castle. To progress, you need to destroy the six barriers blocking off the central tower. Each barrier corresponds to one of the temples. The Fire and Light doors are blocked off with black and gold blocks, so you can't go in those right away.
 Graphic: Johnny Yu/Polygon | Source images: Nintendo EPD/Nintendo via Polygon
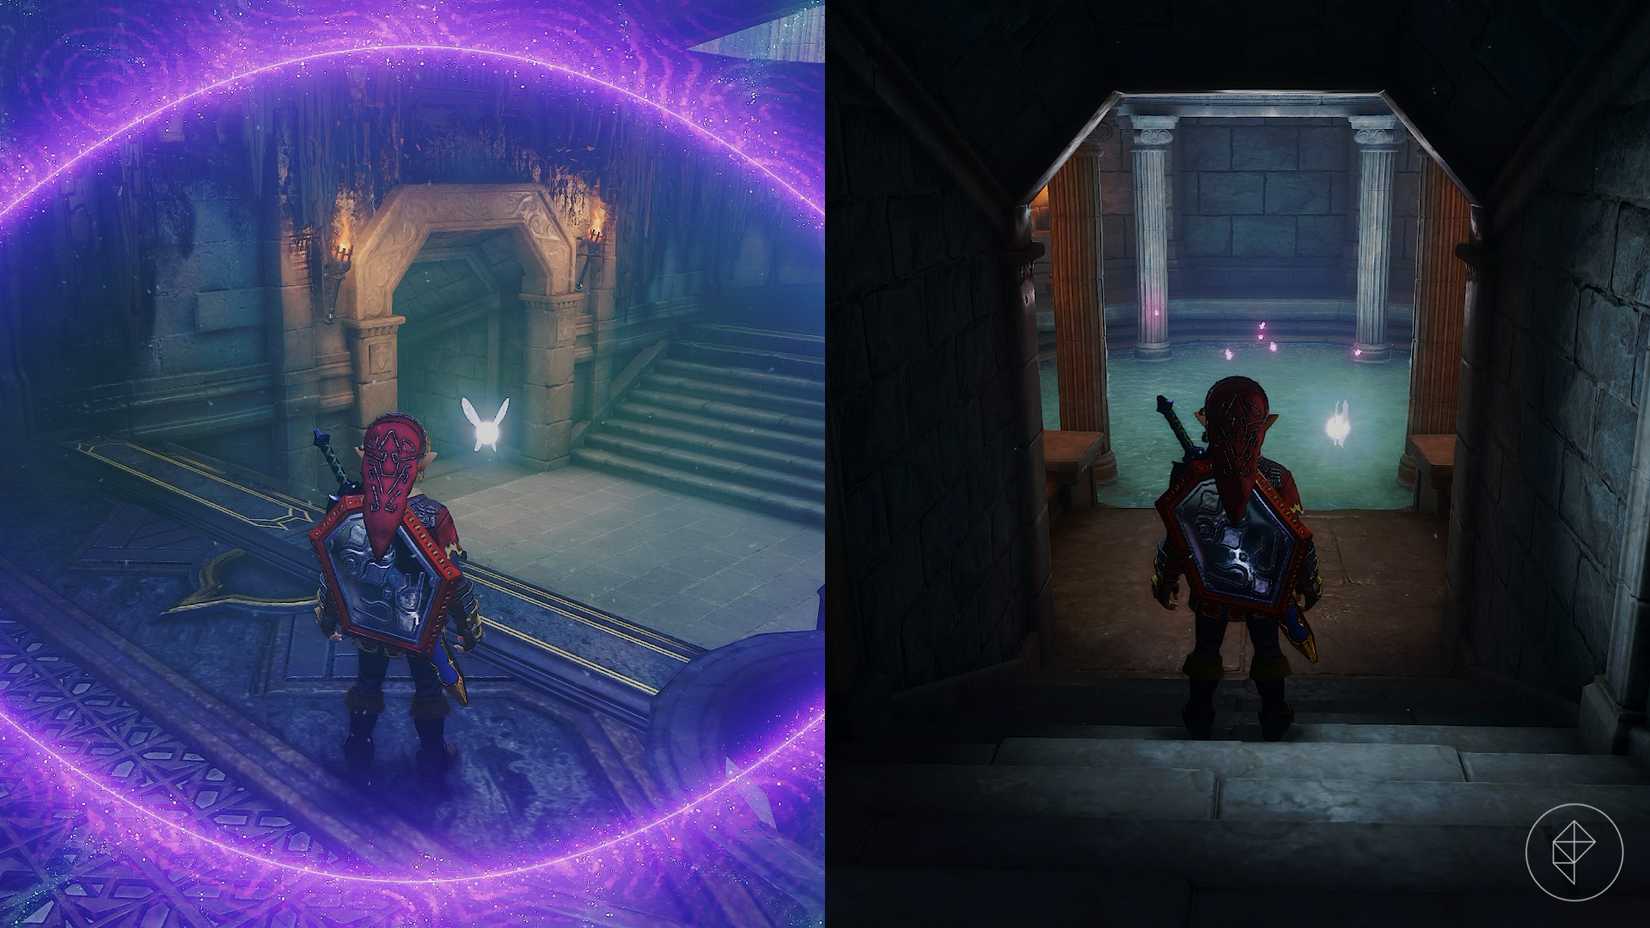
Before you head into any of the rooms, go under the bridge leading to the central tower. Put on the Lenses of Truth, and look at the wall to find a hidden entrance to a Fairy fountain. Come back here if you ever need to heal, or you can bottle a fairy now.
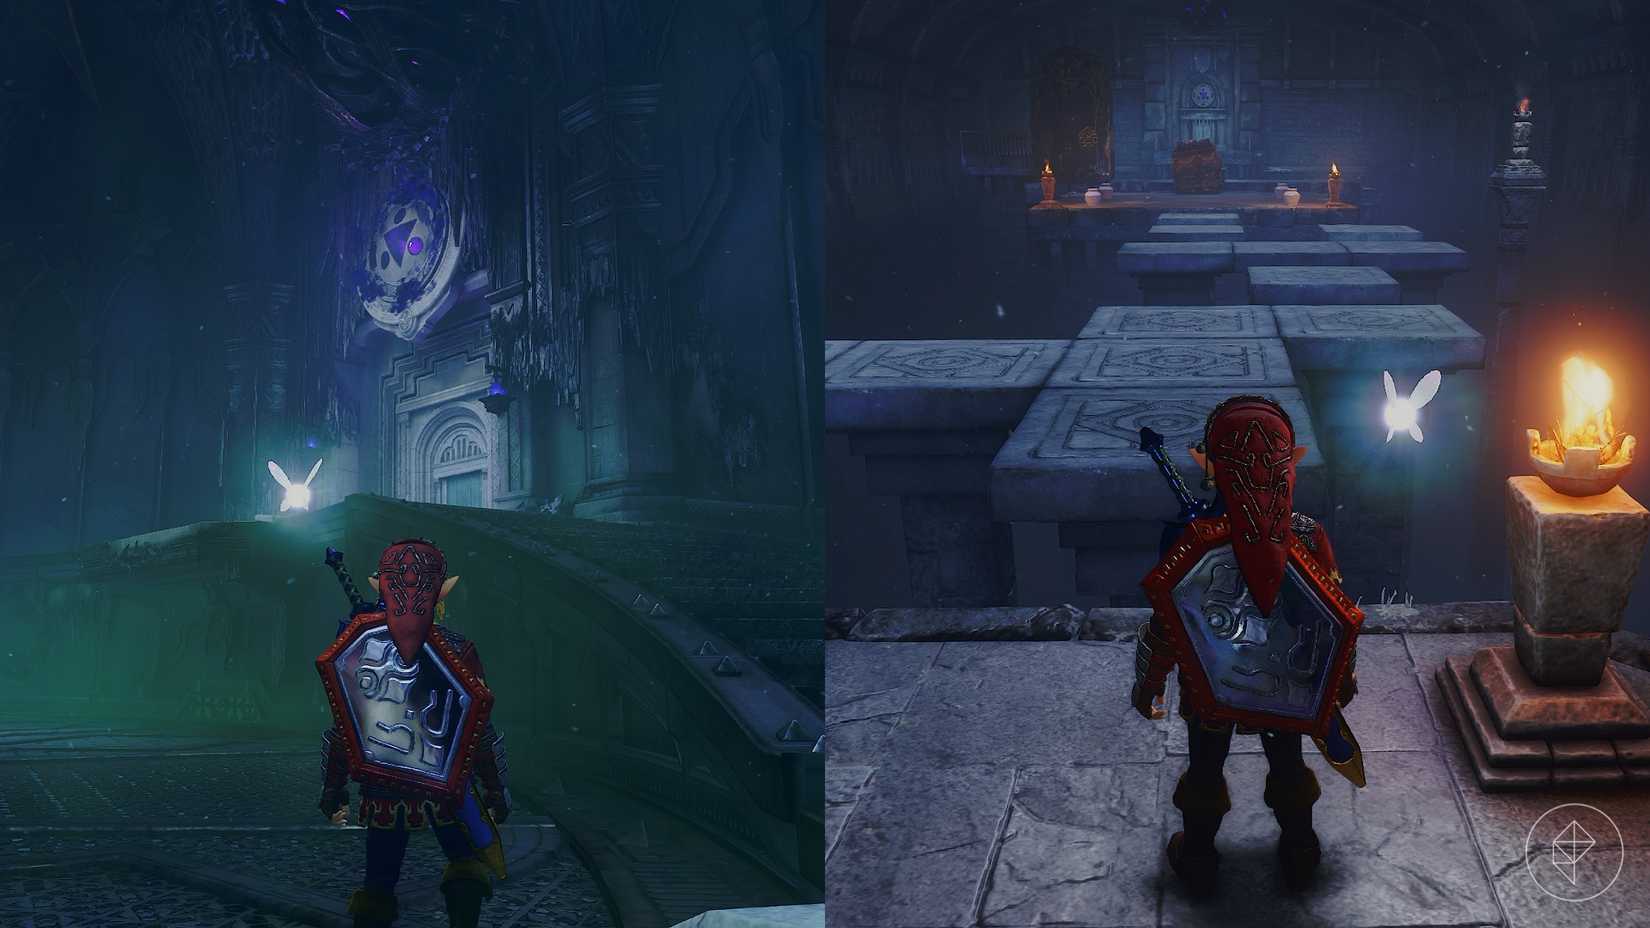
You can technically go into any of the open doors, but first, make your way to the Shadow room, which can be found behind the central pillar. We're sending you to the Shadow room first, because you'll find an important item inside.
 Graphic: Johnny Yu/Polygon | Source images: Nintendo EPD/Nintendo via Polygon
Light the unlit torch on the pillar, and a bunch of platforms will rise from the ground. The platforms won't stay up forever, so you'll have to move quickly. If you need arrows, go to the chest on the side. If not, cross the platforms to the larger platform on the other side of the room.
 Graphic: Johnny Yu/Polygon | Source images: Nintendo EPD/Nintendo via Polygon
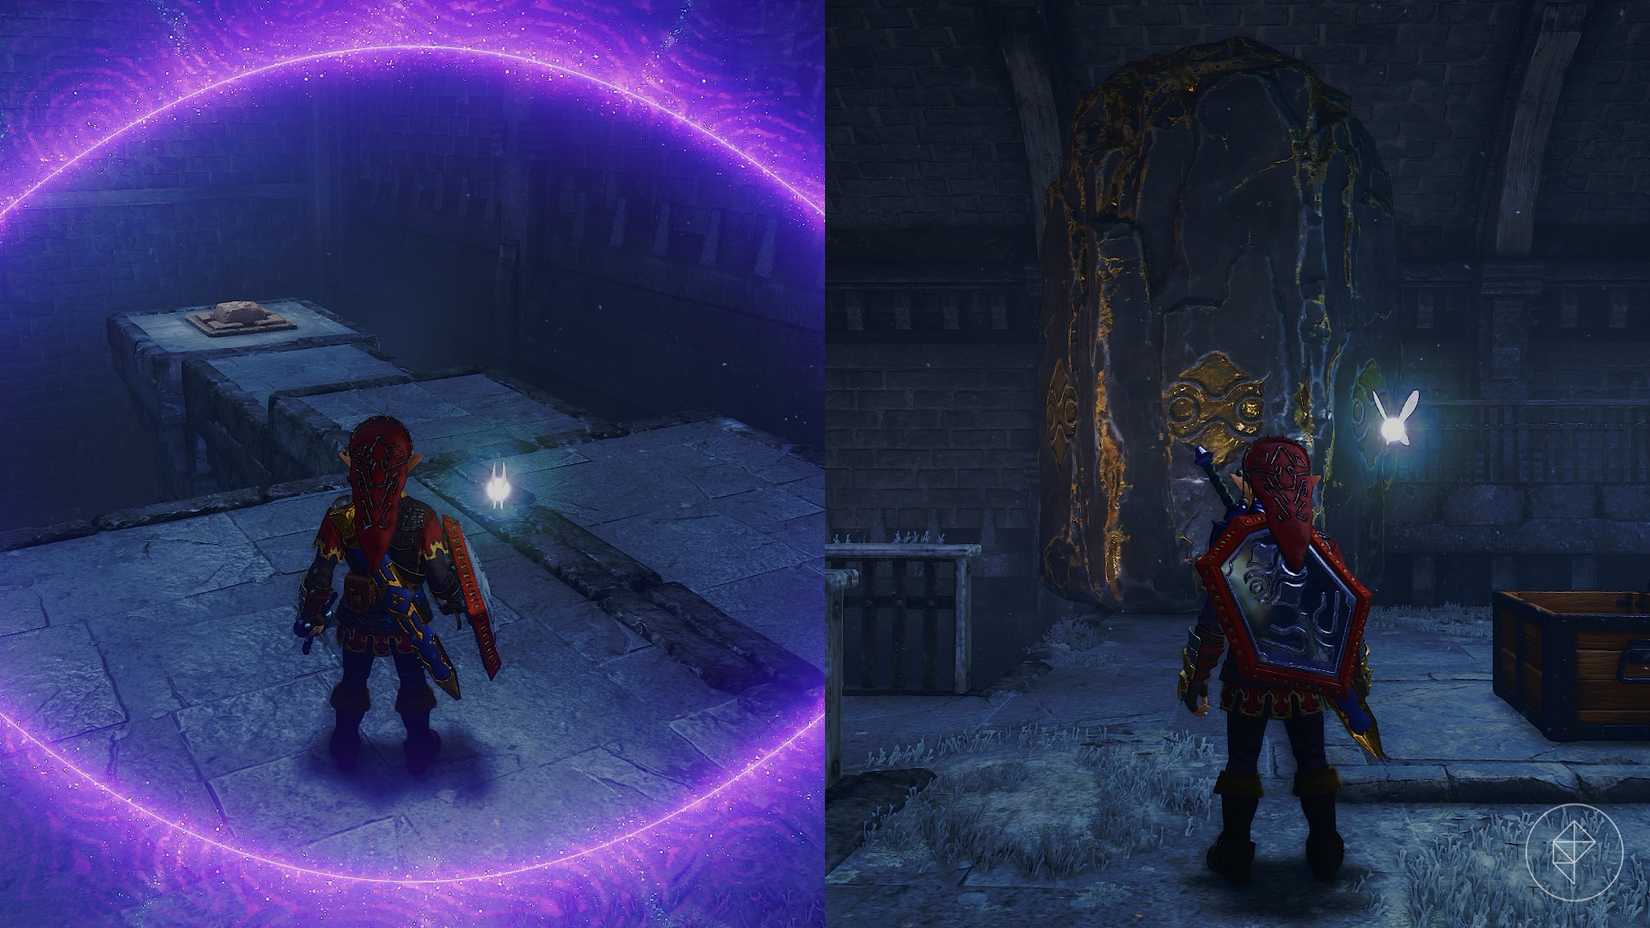
Defeat the Like Like, and use your Hover Boots to cross over to the next platform. Put on the Lenses of Truth to spot a path to the button on your right. Step on it, and a chest containing the Golden Gauntlets will appear. These gauntlets will let you pick up the huge black and gold rock on the left side of the chest. Interact with the rock, and Link will automatically throw it into the pit.
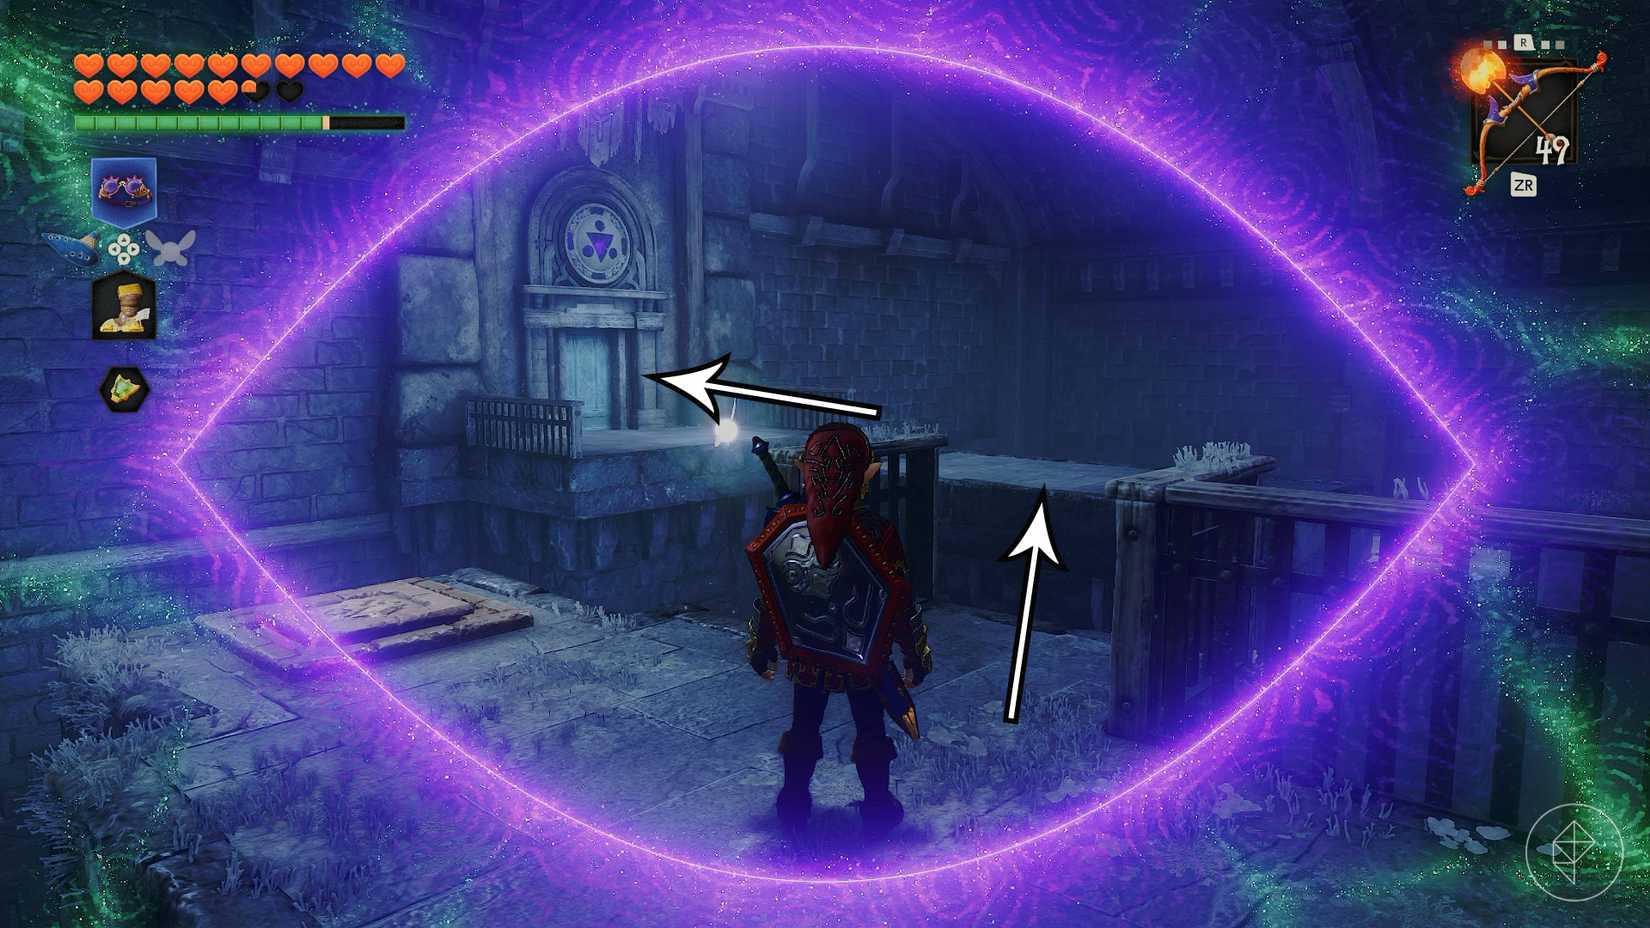 Graphic: Johnny Yu/Polygon | Source images: Nintendo EPD/Nintendo via Polygon
Follow the path ahead and step on the button, which will unlock the door to the next room. Put on the Lenses of Truth, and you'll see a floating platform. Use your Hover Boots to reach it, and then make your way to the next room.
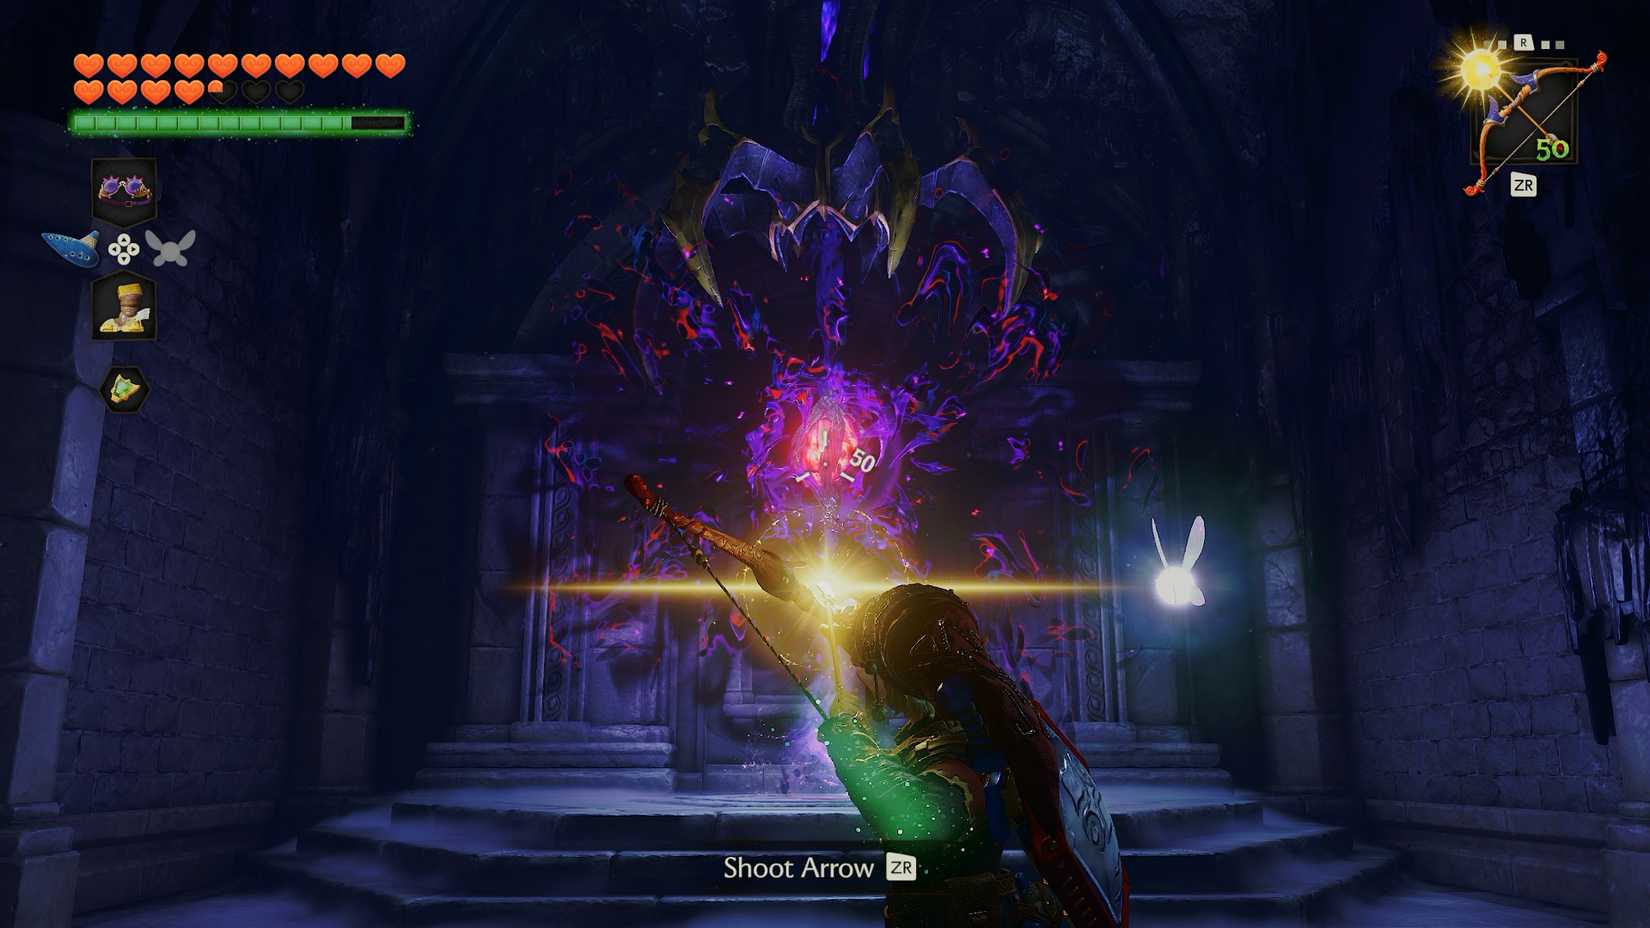 Image: Nintendo EPD/Nintendo via Polygon
In this room, you'll find a mysterious bulb that is emitting dark energy. Equip the Light Arrows that Zelda gave you, and shoot an arrow at the bulb. Impa will appear and tell you that you need to save the princess, sending you back to the main room in the process.
Now, you're free to enter the rooms in any order you'd like, but first, we recommend exiting Ganon's Castle and throwing the black and gold rock just across the bridge. This will reveal the entrance to a Great Fairy Fountain, where you'll receive the Gift of Halved Damage. This will halve all damage taken, and you can get it as long as you offer 500 rupees to the fountain.
Part 2: Breaking the Forest barrier
You're free to go into any room, but for this guide, we'll just be going counterclockwise from the entrance.
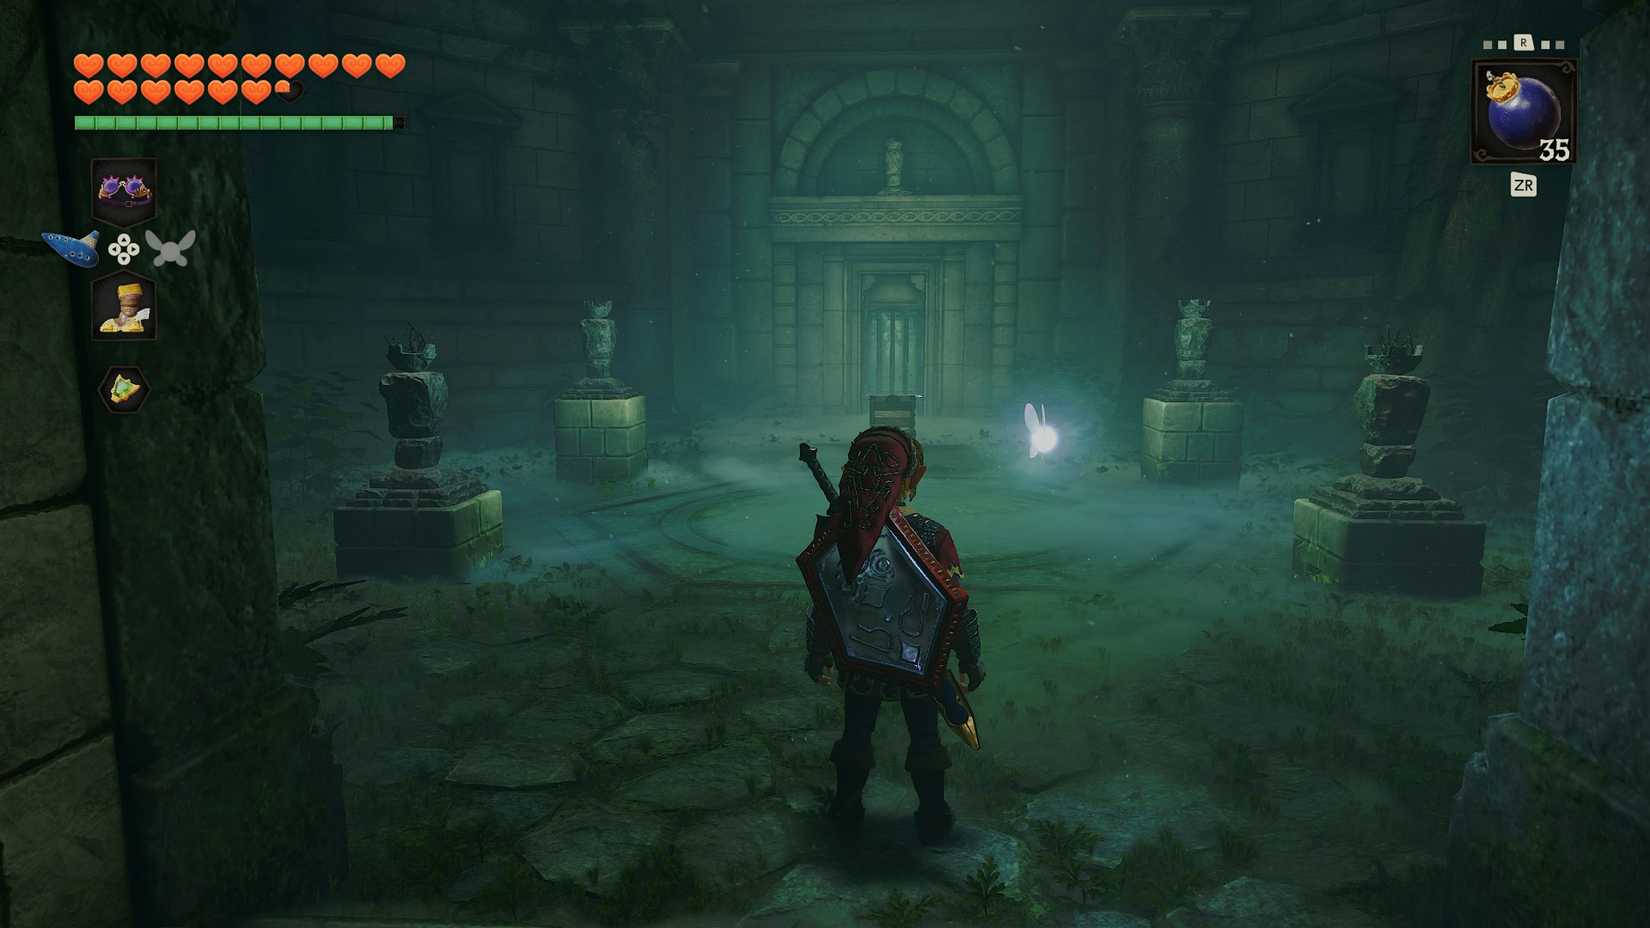 Image: Nintendo EPD/Nintendo via Polygon
Head inside the Forest door, which is on your right. In this room, you'll find a Wolfos and five unlit torches (four in the center and one above the locked door). Defeat the Wolfos and use either Din's Fire or Fire Arrows to light the torches.
 Graphic: Johnny Yu/Polygon | Source images: Nintendo EPD/Nintendo via Polygon
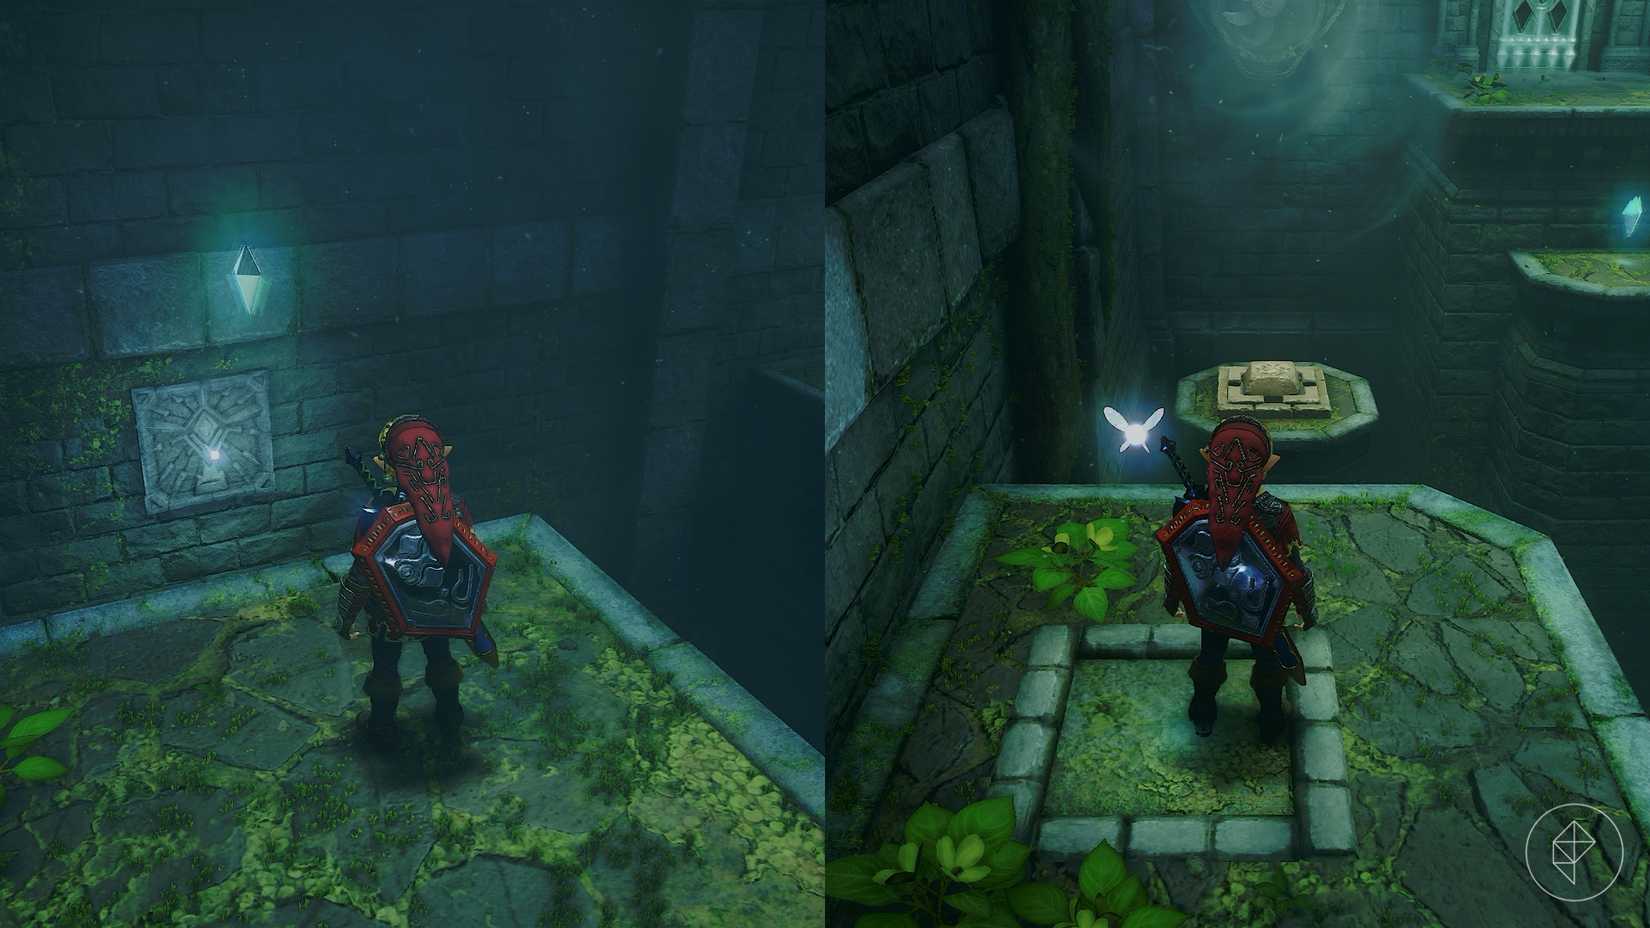
Go into the next room, which is a crystal room. You'll find a fan in each corner and a Beamos in the center of the room. Walk over to the left, and you'll spot a time sigil on the wall. Play the Song of Time (A - L - R- A - L - R) and a time cube will appear. Jump over to it, collect the crystal, and put on your Hover Boots before the wind blows again. Take out the Beamos, and use your Hover Boots to reach the button. Longshot to the target that rises, and collect the crystal above it. Then, use your Hover Boots to collect the remaining three crystals.
Head into the next room to find a mysterious pulsating bulb that is emitting dark energy. Equip your Fairy Bow with Light Arrows and shoot it. The barrier will fall and Saria will appear. She'll give you some motivational words before you teleport back to the main room.
Part 3: Breaking the Water barrier
 Graphic: Johnny Yu/Polygon | Source images: Nintendo EPD/Nintendo via Polygon
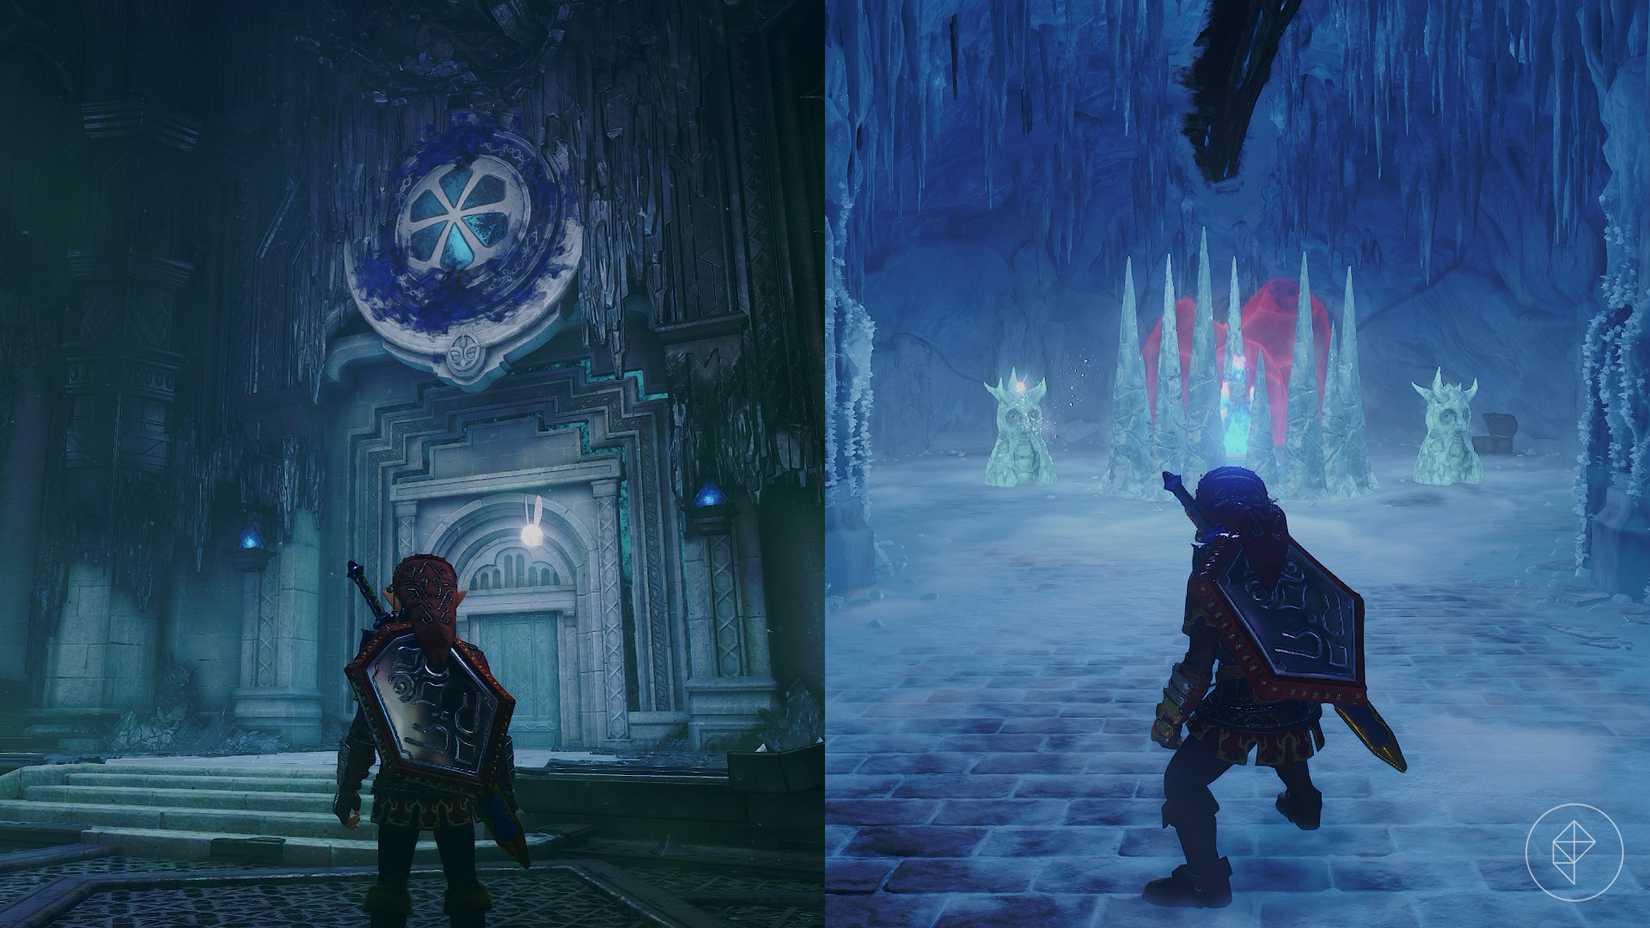
Next, head into the Water room, but be careful as two Freezards will spawn as soon as you enter. If you have Fire Arrows, you can use them to melt the Freezards in one hit. Otherwise, avoid their icy breath and take them out. Break the ice stalagmites surrounding the blue fire in the center of the room. Bottle some blue fire and use it to melt the red ice. Bottle up some more blue fire for the next room. Also, don't try to open the chest on the left side of the room, because it's fake!
 Graphic: Johnny Yu/Polygon | Source images: Nintendo EPD/Nintendo via Polygon
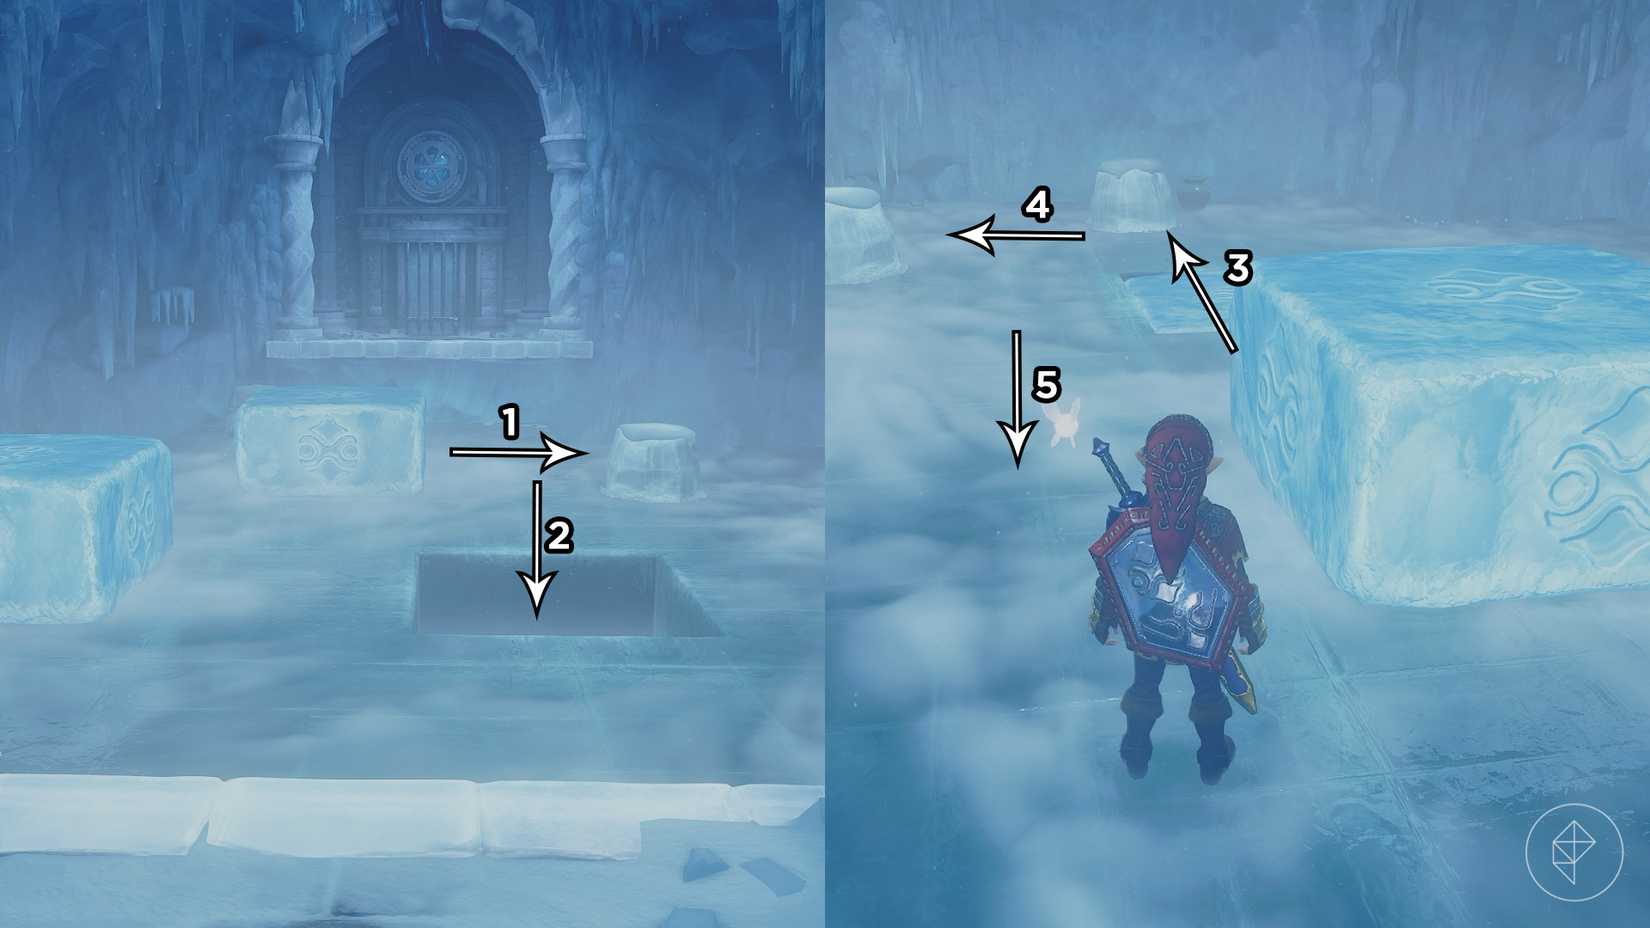
Go into the next room, and you'll find two movable ice blocks, like the one from the Ice Cavern. Push the farthest block to the right, into the mound of ice. Then, push it into the hole. Push the other ice block over the ice block that fell in the hole and into the ice mound. Then, push it into the other ice mound, and finally, push it toward the red ice. Melt the red ice and hit the button with the Megaton Hammer to unlock the door.
Hit the bulb with a Light Arrow, Ruto will tell you the usual spiel about helping Zelda, and you'll get teleported back to the main room.
Part 4: Breaking the Fire barrier
 Graphic: Johnny Yu/Polygon | Source images: Nintendo EPD/Nintendo via Polygon
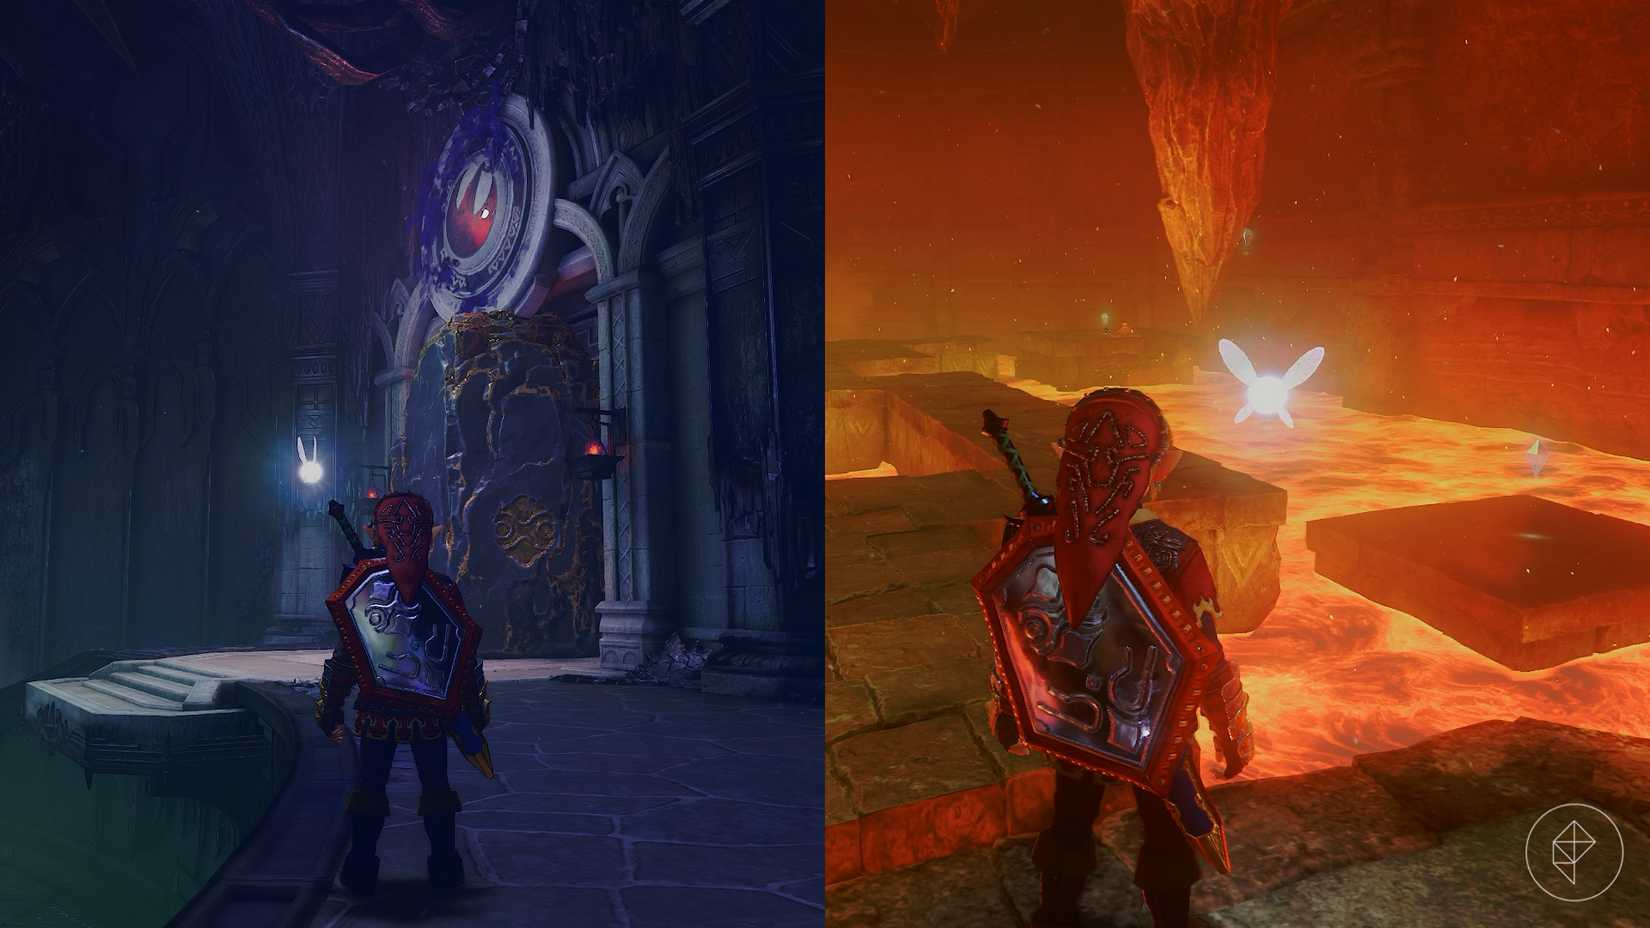
Head to the Fire room and throw the giant black and gold rock out of the way. Equip the Goron Tunic and go inside. This is another room where you have to collect five crystals. Three can be found on the right side of the room, while the other two are on the left. However, as soon as you step onto the winding platforms, they'll all slowly sink into the lava. Quickly run to each crystal to avoid sinking. To get every crystal, you need to throw the black and gold rock into the stalactite. It'll fall into the lava and make a platform to reach one of the crystals.
After you've collected every crystal, Longshot to the door and head into the next room to find the beating bulb again. Hit it with a Light Arrow, and you'll meet your brother Darunia, who will send you back to the main room.
Part 5: Breaking the Light barrier
 Graphic: Johnny Yu/Polygon | Source images: Nintendo EPD/Nintendo via Polygon
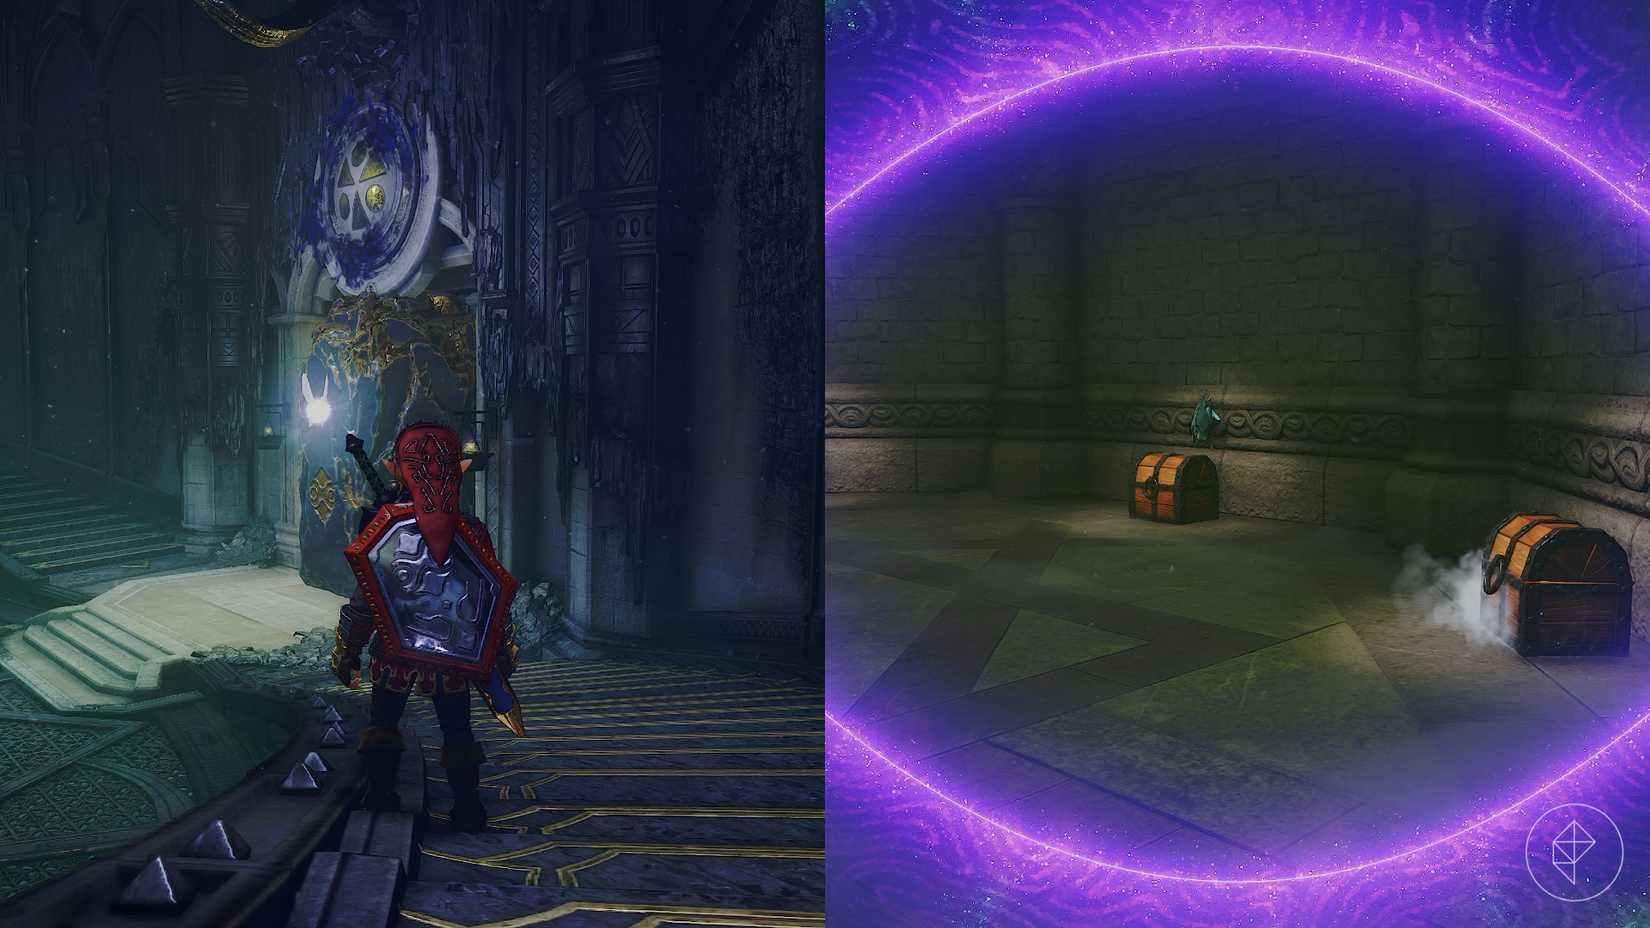
Throw the rock blocking the Light room, and head inside. Equip the Lenses of Truth to spot a few invisible Keese on the walls and the invisible Skulltula hanging from the ceiling. Take them out first to unlock the door and spawn a chest containing a red rupee in the center of the room. Then, spot the moving chests around the room. Don't open them, but hit them instead. Afterwards, you're free to open the other chests, which will all have a blue rupee.
 Graphic: Johnny Yu/Polygon | Source images: Nintendo EPD/Nintendo via Polygon
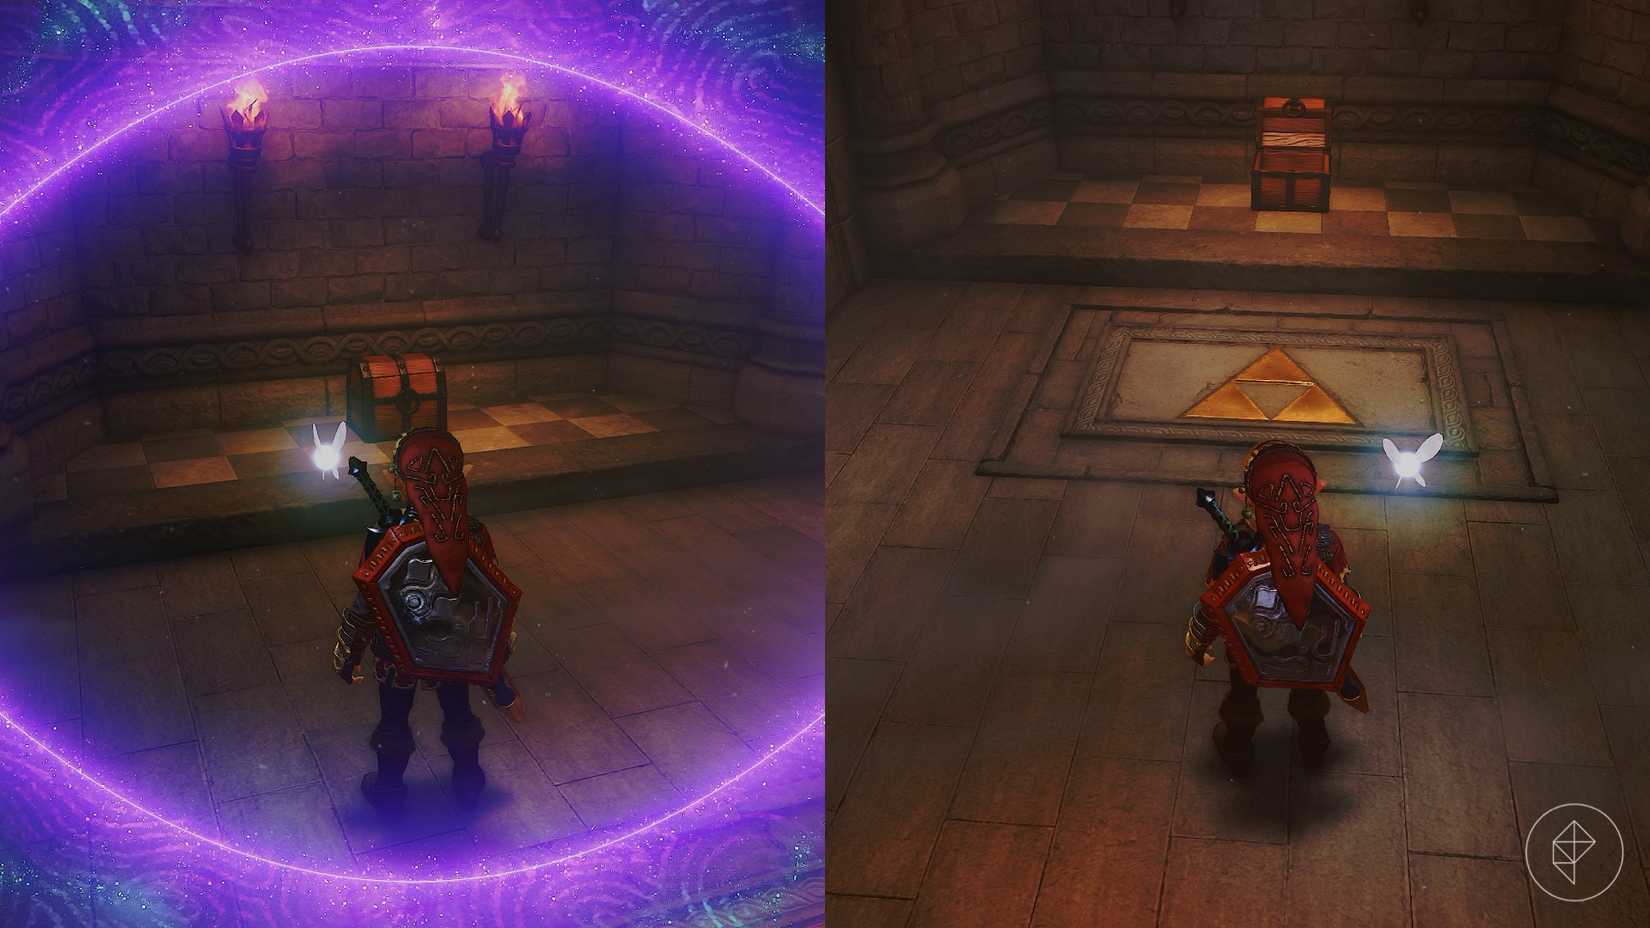
Go into the next room, and use the Lenses of Truth to find the invisible chest on the left side of the room. Open it to get a small key. If you'd like a green rupee, play Zelda's Lullaby (Y - X - A - Y - X - A) on the Triforce to spawn a chest with one inside. Use the small key to open the door to the next room.
 Graphic: Johnny Yu/Polygon | Source images: Nintendo EPD/Nintendo via Polygon
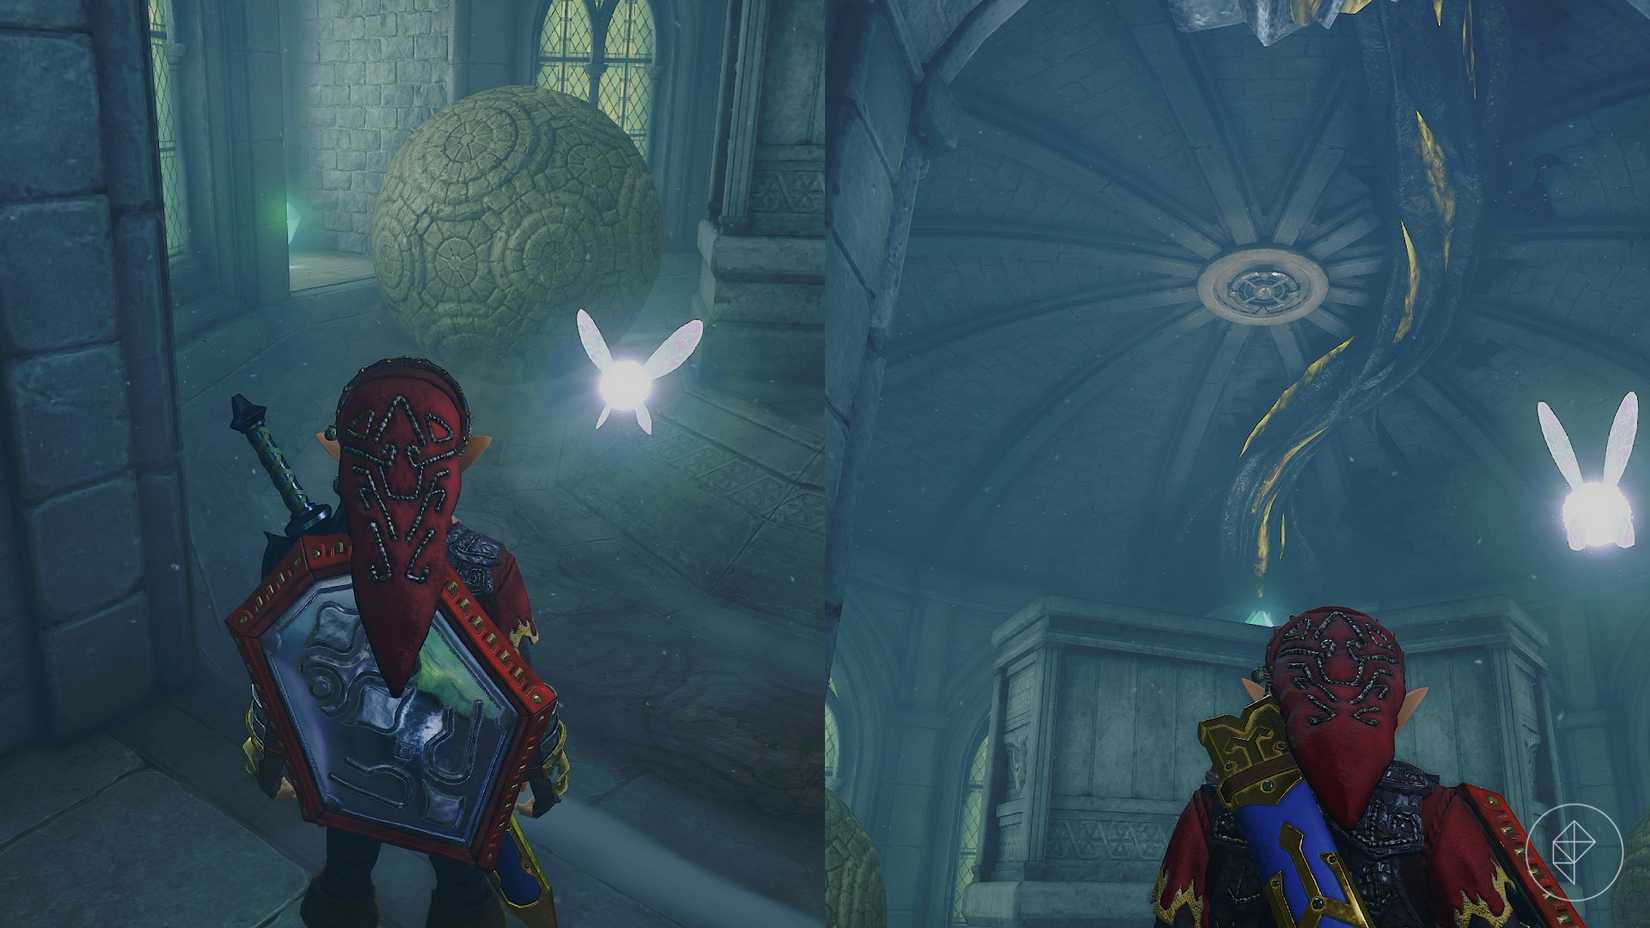
Inside this room, you need to collect all five crystals, but there are a couple rolling boulders that you need to look out for. Follow a boulder and pick up the crystals as you run around the room. After you've picked up four, stand in one of the alcoves and look at the ceiling in the center of the room. Longshot to the target, and grab the last crystal on the center platform.
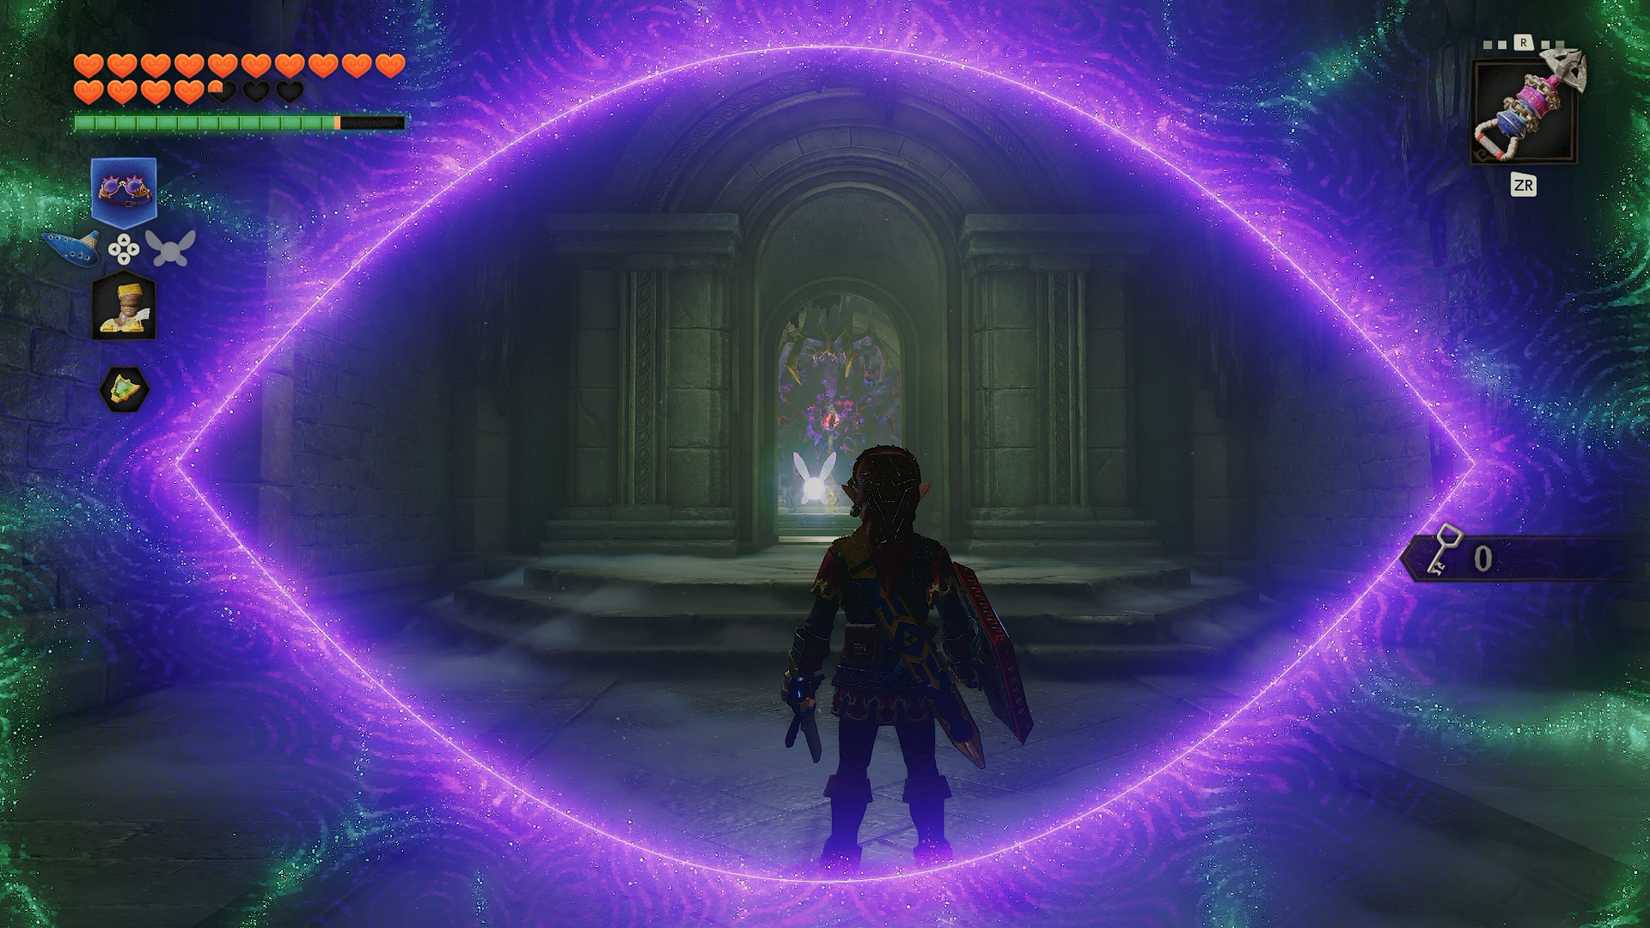 Image: Nintendo EPD/Nintendo via Polygon
Head into the next room, only to realize that the bulb is missing. A spotlight will form on top of you, meaning a Wallmaster will shortly drop onto the ground. Avoid them and take them out. Then, put on the Lenses of Truth to see the bulb through a fake wall. Go through and hit it with a Light Arrow. Rauru will appear and send you back to the main room.
Part 6: Breaking the Spirit barrier
 Graphic: Johnny Yu/Polygon | Source images: Nintendo EPD/Nintendo via Polygon
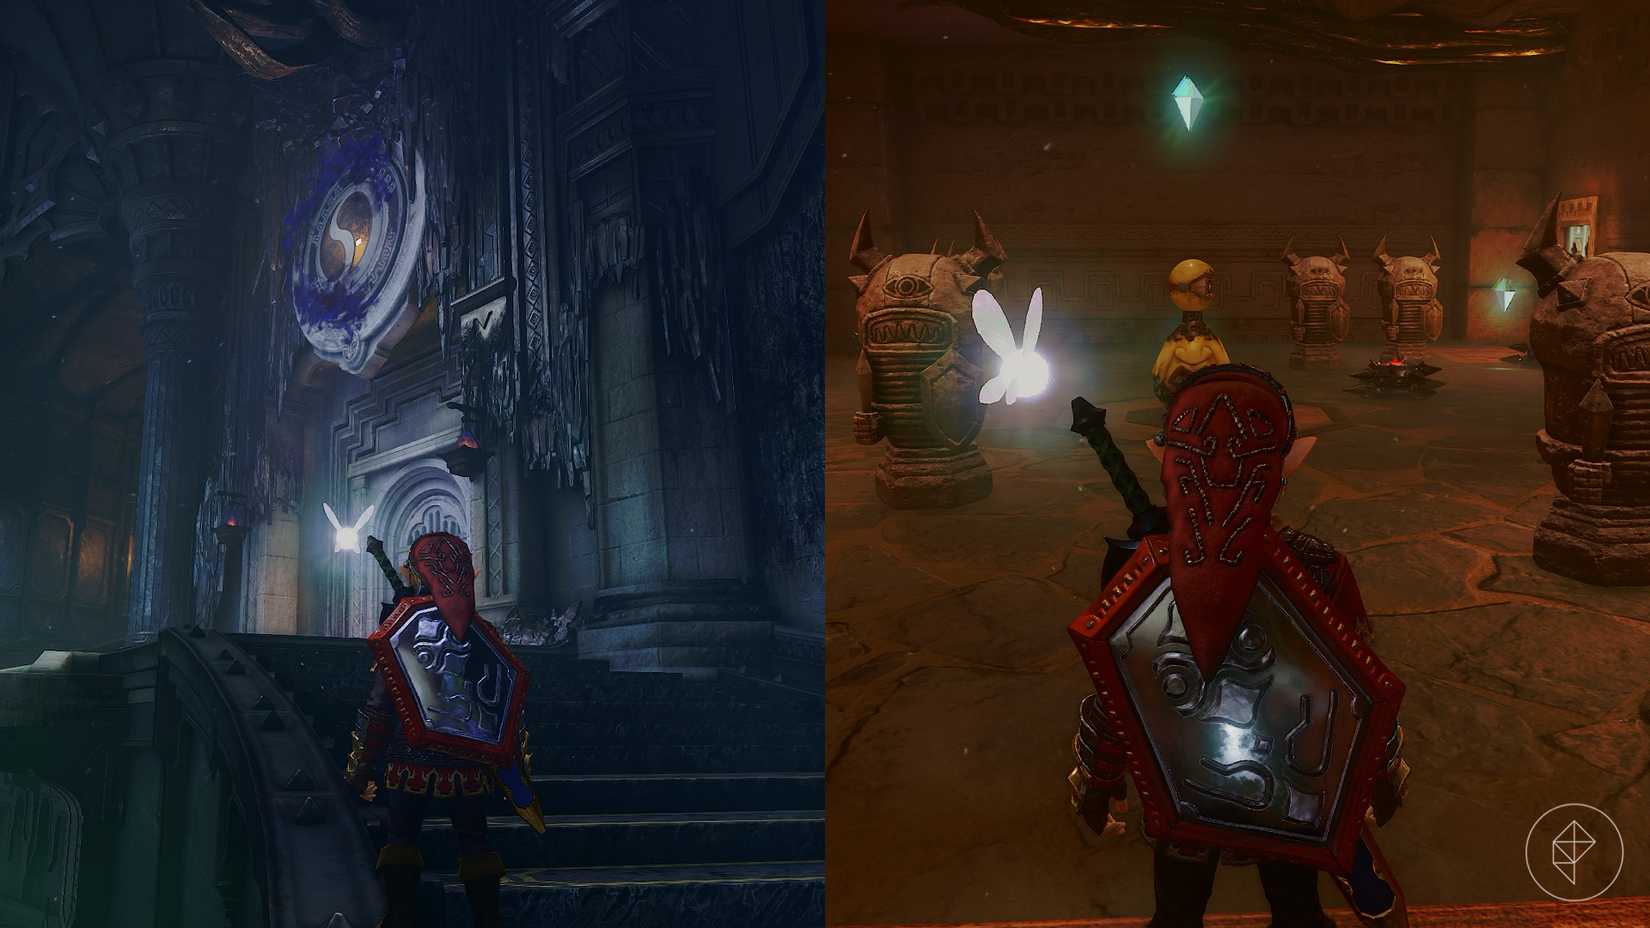
Go into the Spirit room, and you'll find a bunch of statues, Blade Traps, and a Beamos. This room is also another crystal room, so you'll have to grab the five crystals to unlock the next door. Move the statues so that the Blade Traps have more space to move, which also means you'll have more time to collect the crystals. However, the statue in the far left corner is actually an Armos, so keep your Megaton Hammer ready to whack them.
 Graphic: Johnny Yu/Polygon | Source images: Nintendo EPD/Nintendo via Polygon
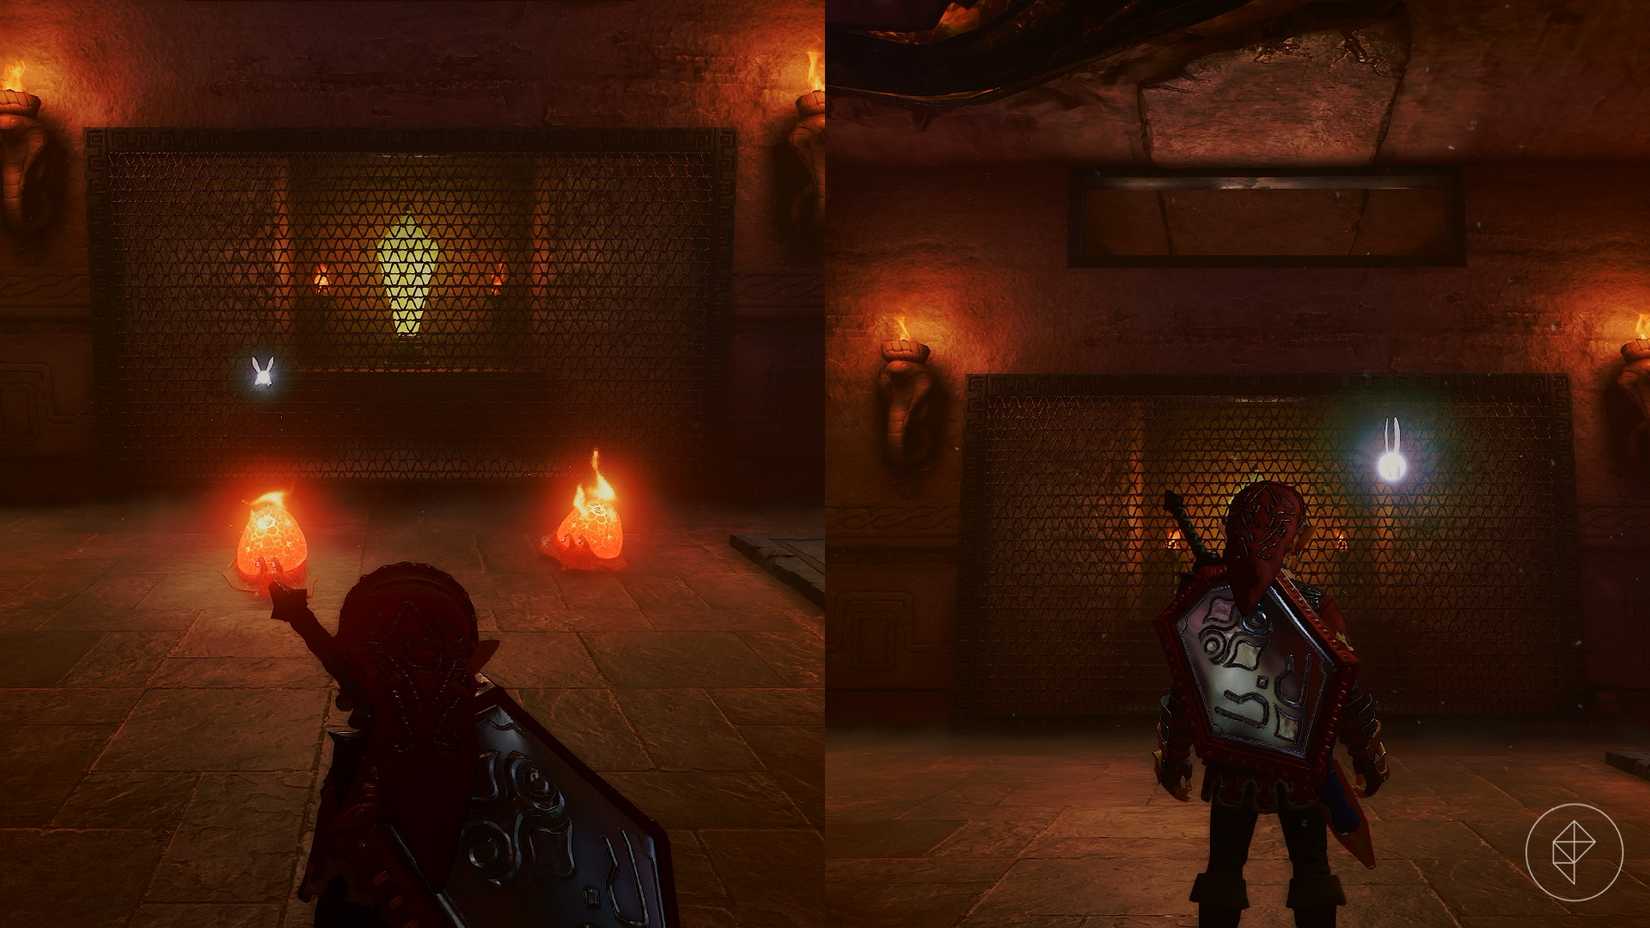
After you collect the crystals, head into the next room, where you'll be greeted with two Torch Slugs in front of a mesh wall. Hit them with your Megaton Hammer to make quick work of them, and a chest containing a Business Scrub seed will appear on your right. If you look through the mesh wall, you'll see a diamond-shaped switch, and if you look above the wall, you'll see a hole. Get as close to the wall as you can, and quickly release a Bombchu. It'll crawl through the hole and blow up right next to the switch, unlocking the door to the next room.
 Graphic: Johnny Yu/Polygon | Source images: Nintendo EPD/Nintendo via Polygon
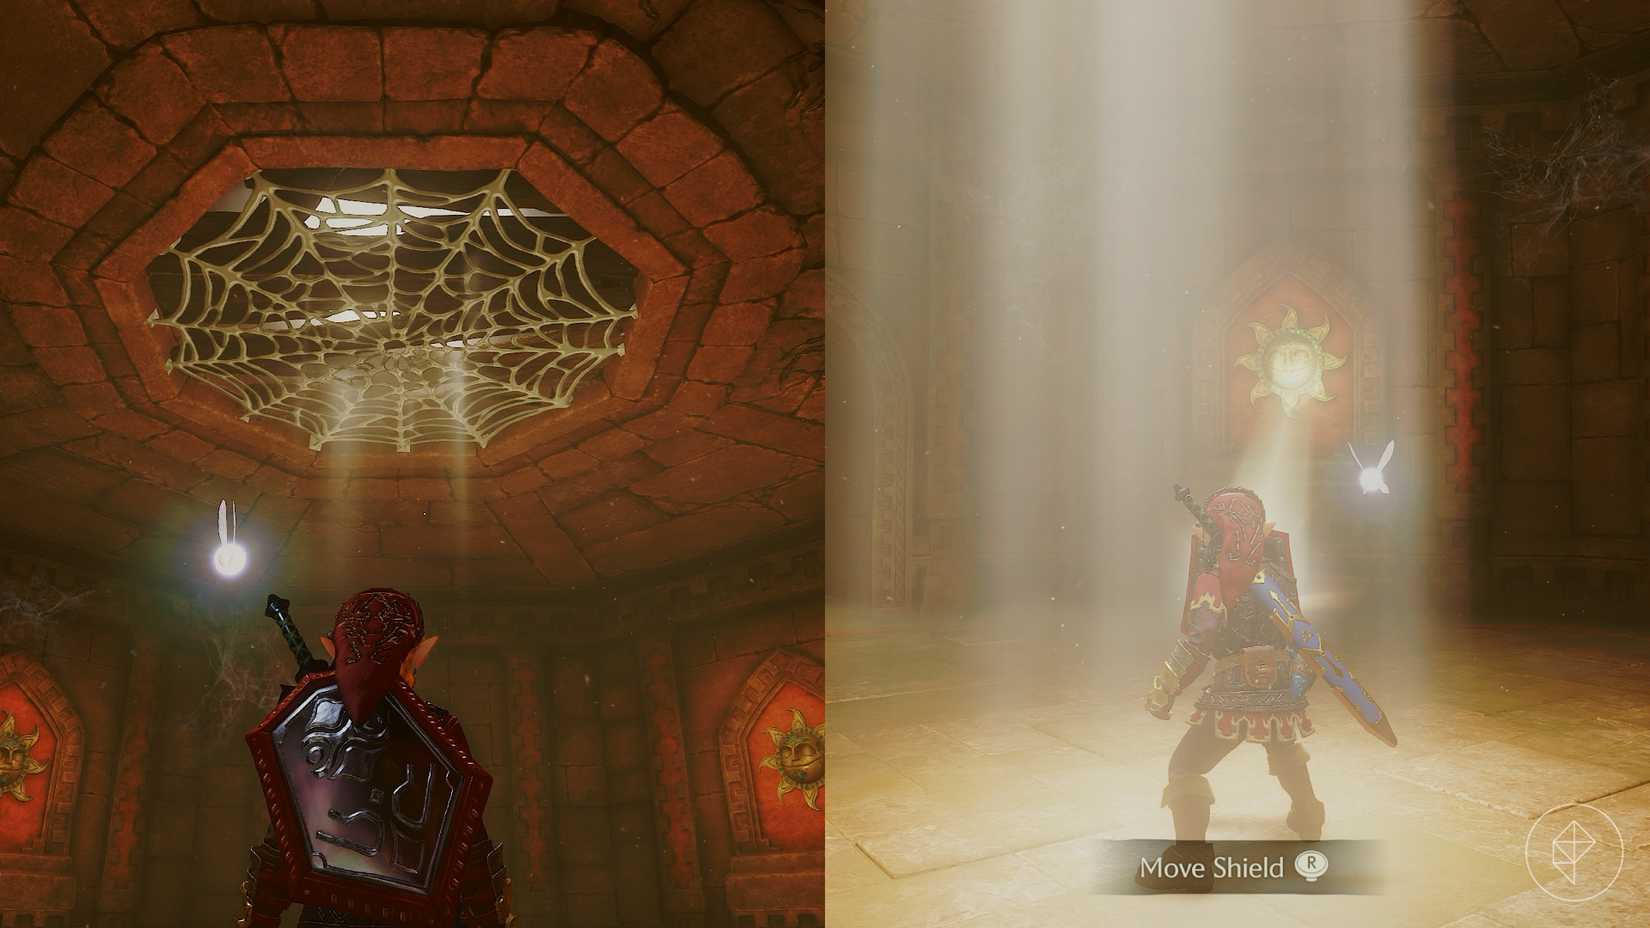
Go to the next room, and you'll see a spider web on the ceiling and suns on the wall. Hit the spider web with a Fire Arrow or Din's Fire, and sunlight will come through the hole in the ceiling. Reflect the light onto the sun to the right of the doorway you just came through. You'll see that the sun is filling up with green light, and then the door will unlock. Don't reflect the light onto any of the suns that fill up with red light, or else a Floormaster or a Wallmaster will spawn.
Head through the unlocked door, and shoot the bulb with a Light Arrow to break the barrier.
Part 7: Getting the boss key
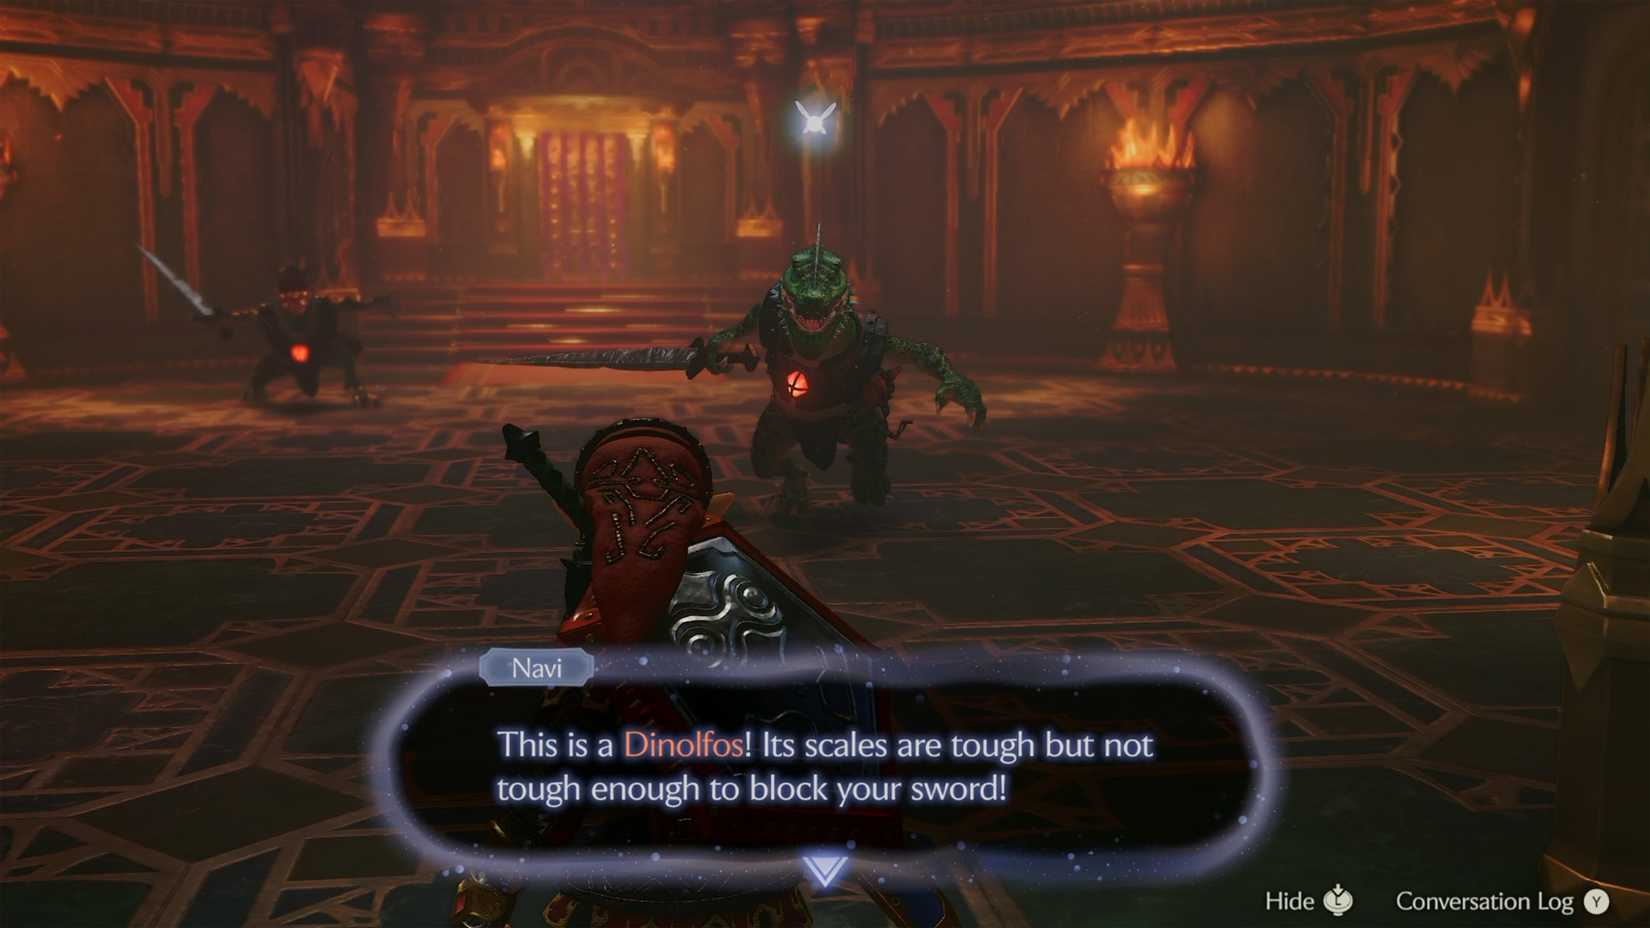 Image: Nintendo EPD/Nintendo via Polygon
Make your way into the central tower, and ride the elevator to the next floor. Follow the path ahead, defeat the Fire Keese, and go through the door. You'll enter a room with two Dinolfos. Wait for them to jump at you, dodge to the side, and get a few hits in. Repeat this until you defeat them both, and the door to the next room will unlock.
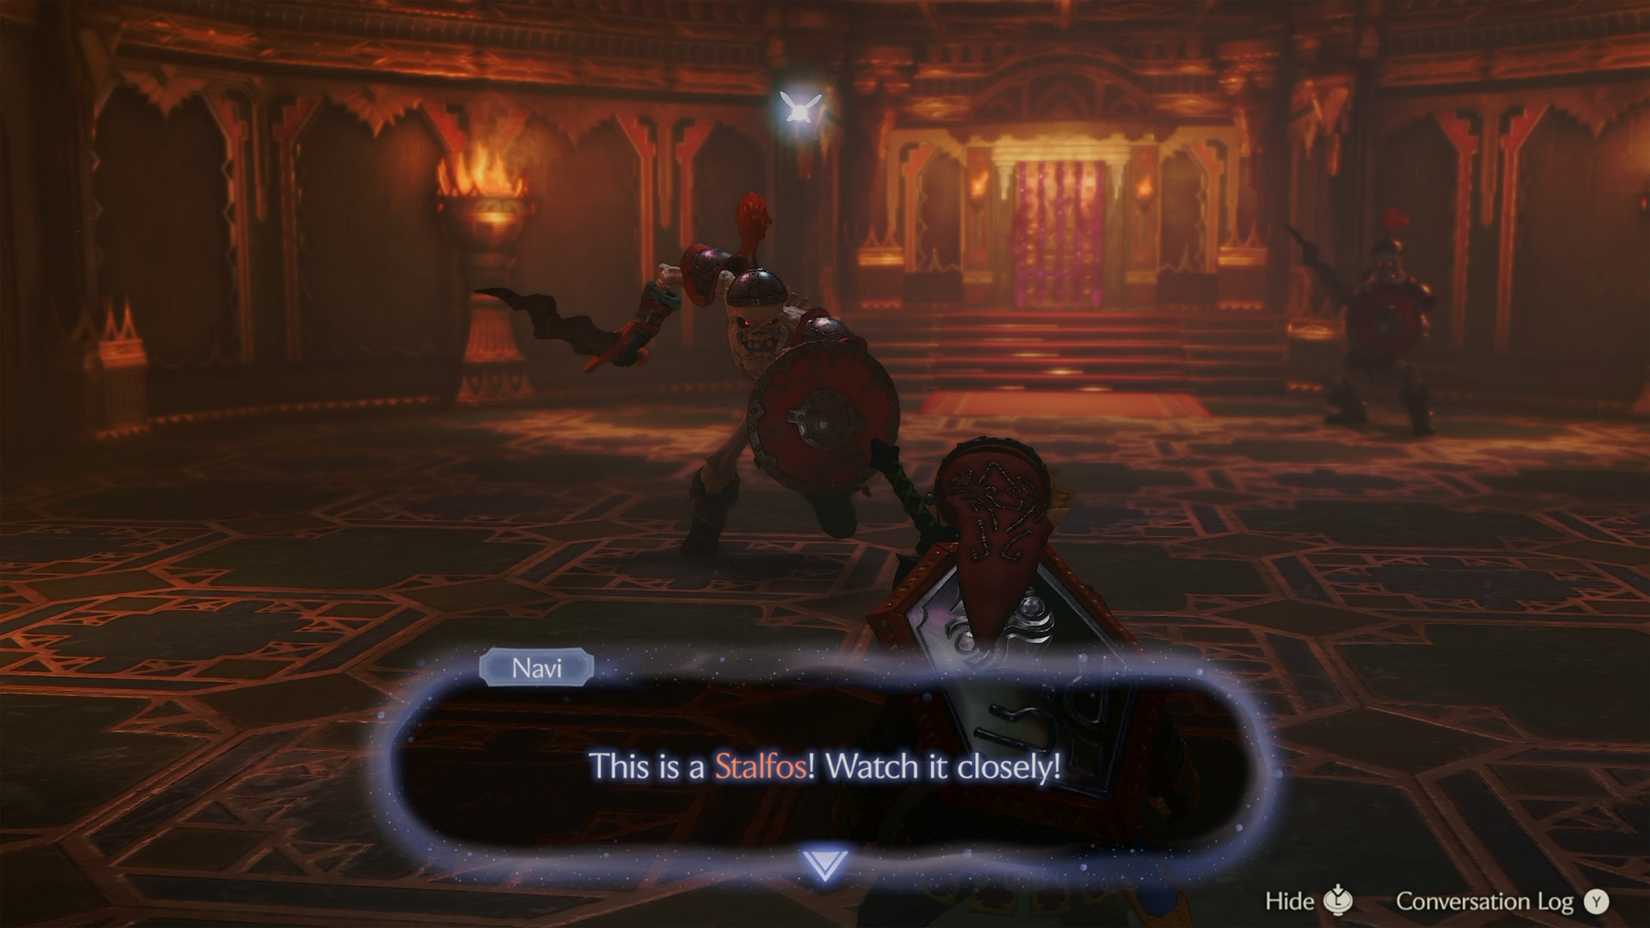 Image: Nintendo EPD/Nintendo via Polygon
Follow the path to the next room, where you'll take on two Stalfos. Watch out for their sword to flash, as that means they're about to do a jump attack. Hop to the side and attack them until you defeat them both.
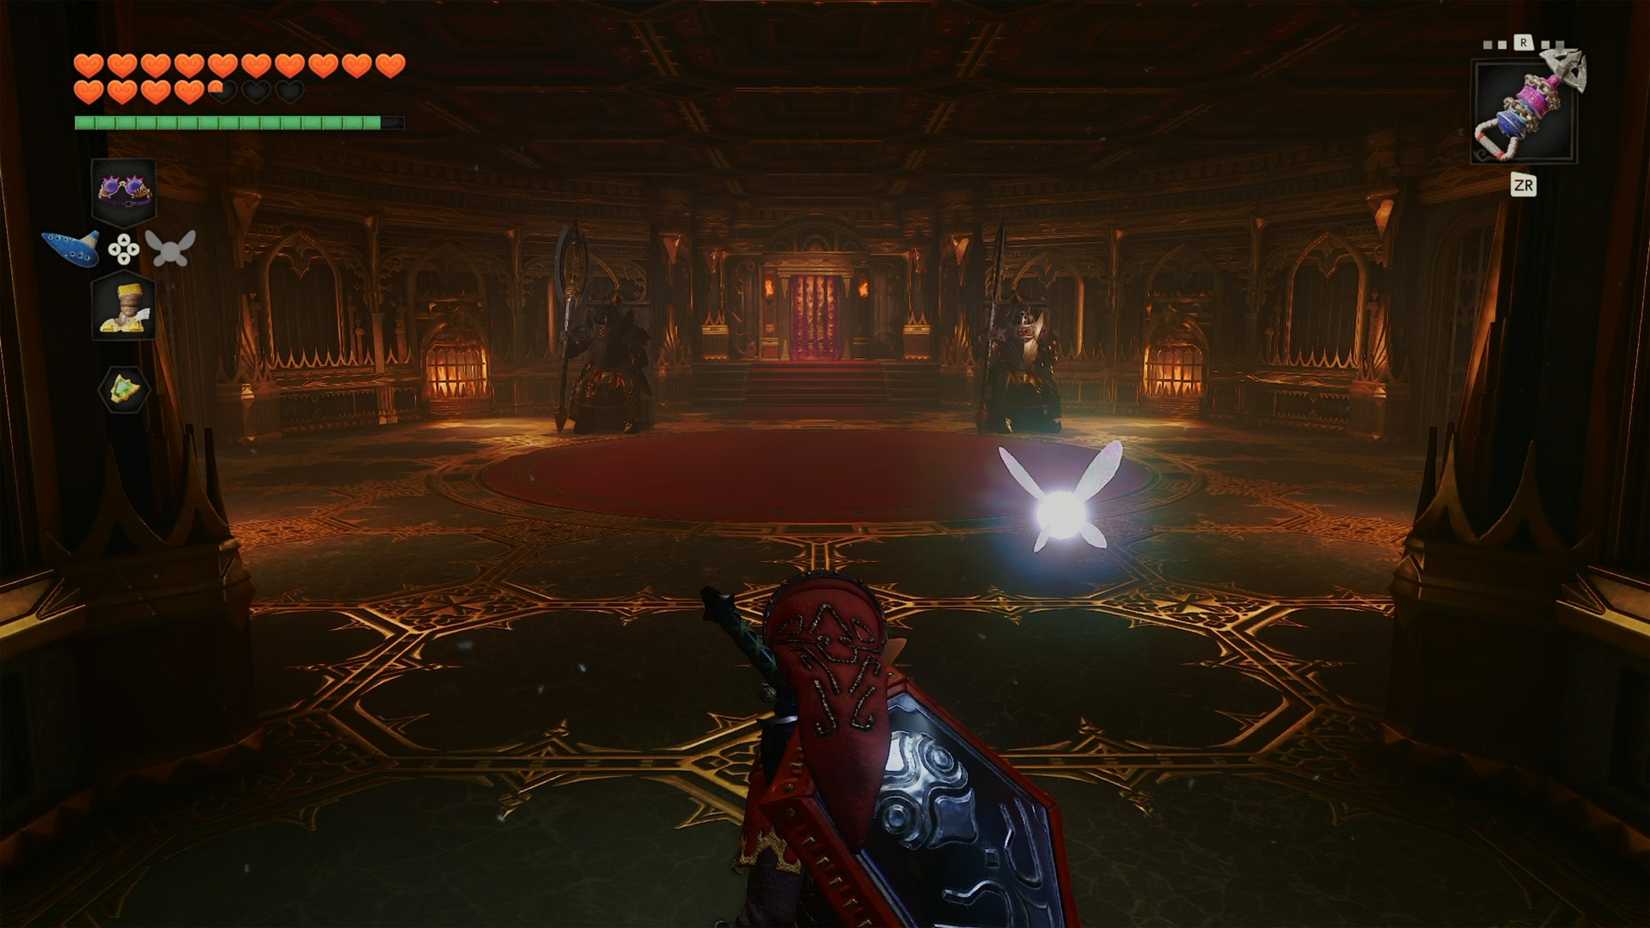 Image: Nintendo EPD/Nintendo via Polygon
Head to the next room, where you'll have to take on two Iron Knuckles, but you only have to wake up one at a time. Backflip away from their side sweeping attack, and jump to the side when they slam their axe in front of them. If you do get hit by an attack, make them destroy their thrones, and three hearts will drop. After you destroy the armor on one Iron Knuckle, the other will wake up, so do your best to quickly take out the first Iron Knuckle. Once you defeat both, a chest containing the boss key will spawn.
Part 8: Defeating Ganondorf's Castle boss
Continue along the path, and you'll enter a room with a bunch of climbable surfaces. Go through the door and up the stairs to find the boss room door.
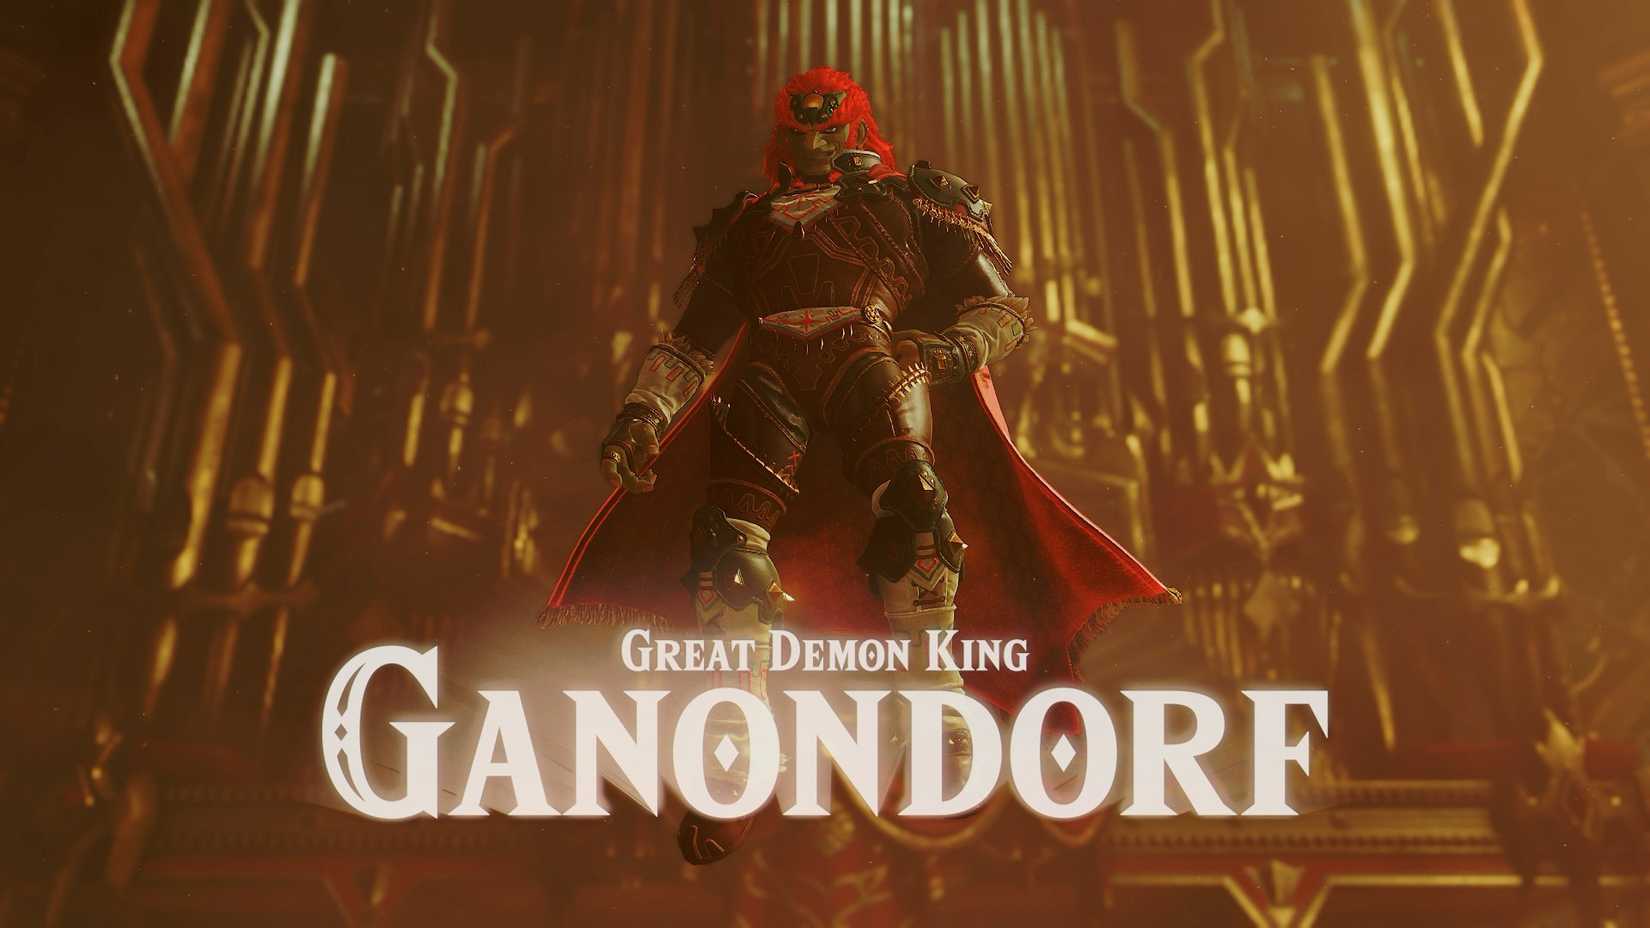 Image: Nintendo EPD/Nintendo via Polygon
Before you face off against the Great Demon King, Ganondorf, there are a few things you should know about the fight:
- This fight is very similar to the Phantom Ganon fight in the Forest Temple. You'll hit the magic ball back and forth until it hits either you or Ganondorf.
- Ganondorf cannot be targeted during this fight, so you need to manually aim at him.
- Ganondorf will take away bits of the floor as the fight progresses. You don't really have to move much in this fight, so you can stick in one place, unless Ganondorf is getting rid of the floor from under you.
- If you do fall, remember that you can Longshot onto climbable walls. Longshot as high as you can, so you don't have to spend a lot of time climbing.
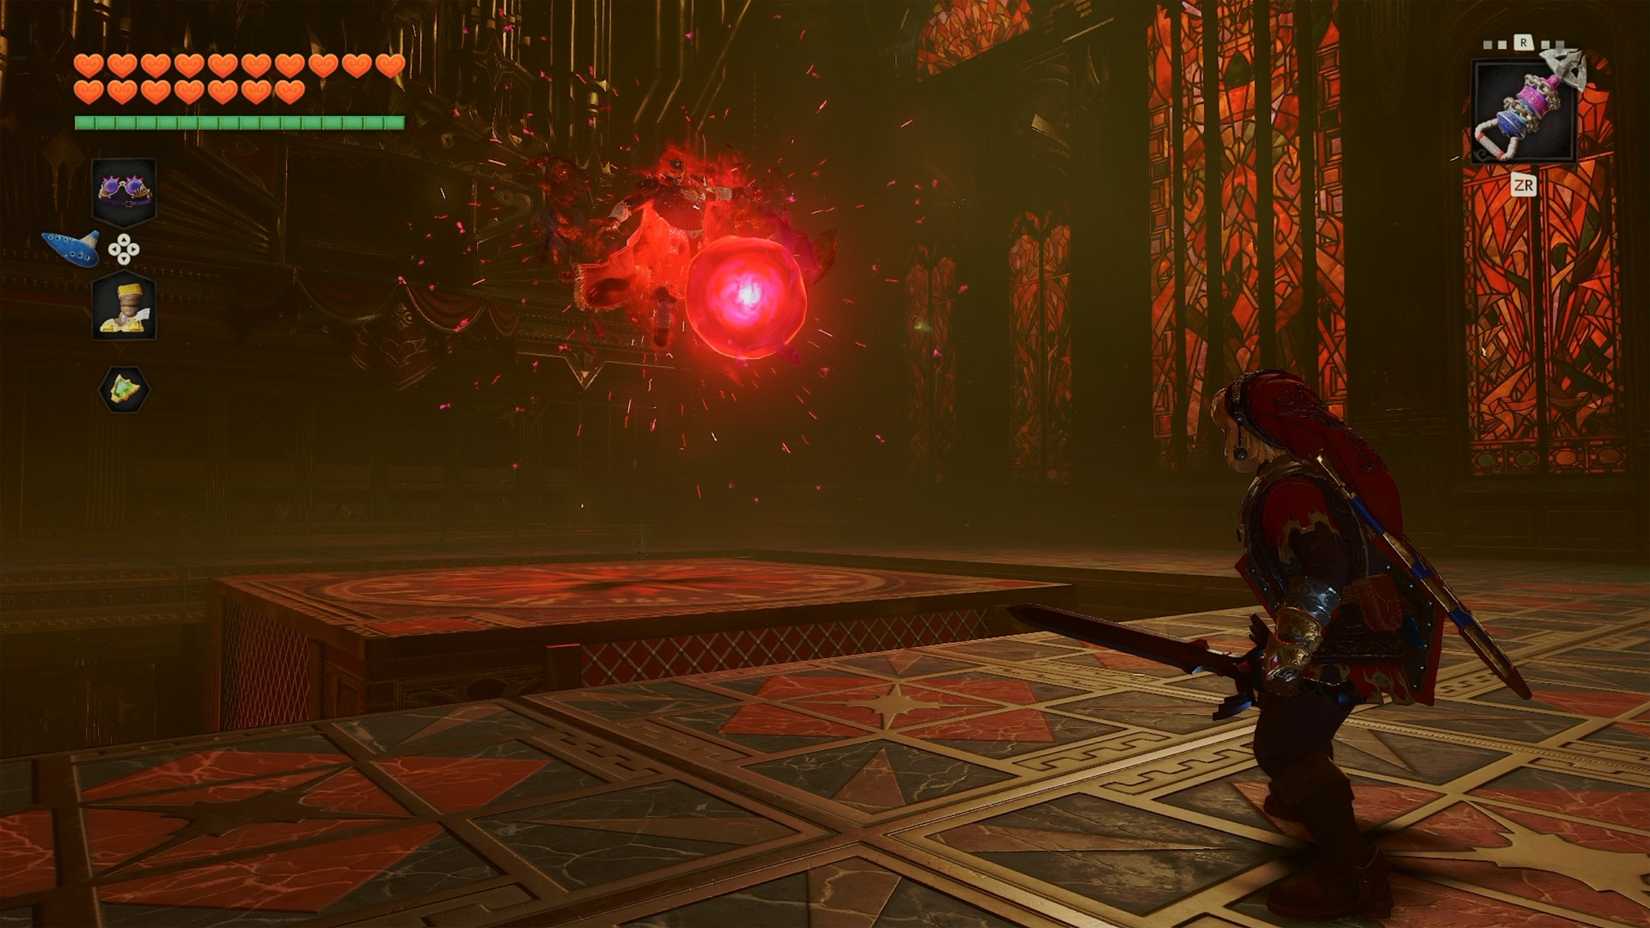 Image: Nintendo EPD/Nintendo via Polygon
At the start of the fight, Ganondorf will slam onto the ground, causing the floor around the center of the room to drop. Then, he'll charge up a magic orb and throw it at you. You need to hit it with your sword to reflect it back at him, but he'll also hit it back, so you'll be in a rally for a bit. After you reflect the ball three times, Ganondorf will charge up his fist and punch the ball a little harder than usual, making the ball faster. Get ready to hit the orb at a faster cadence whenever this happens.
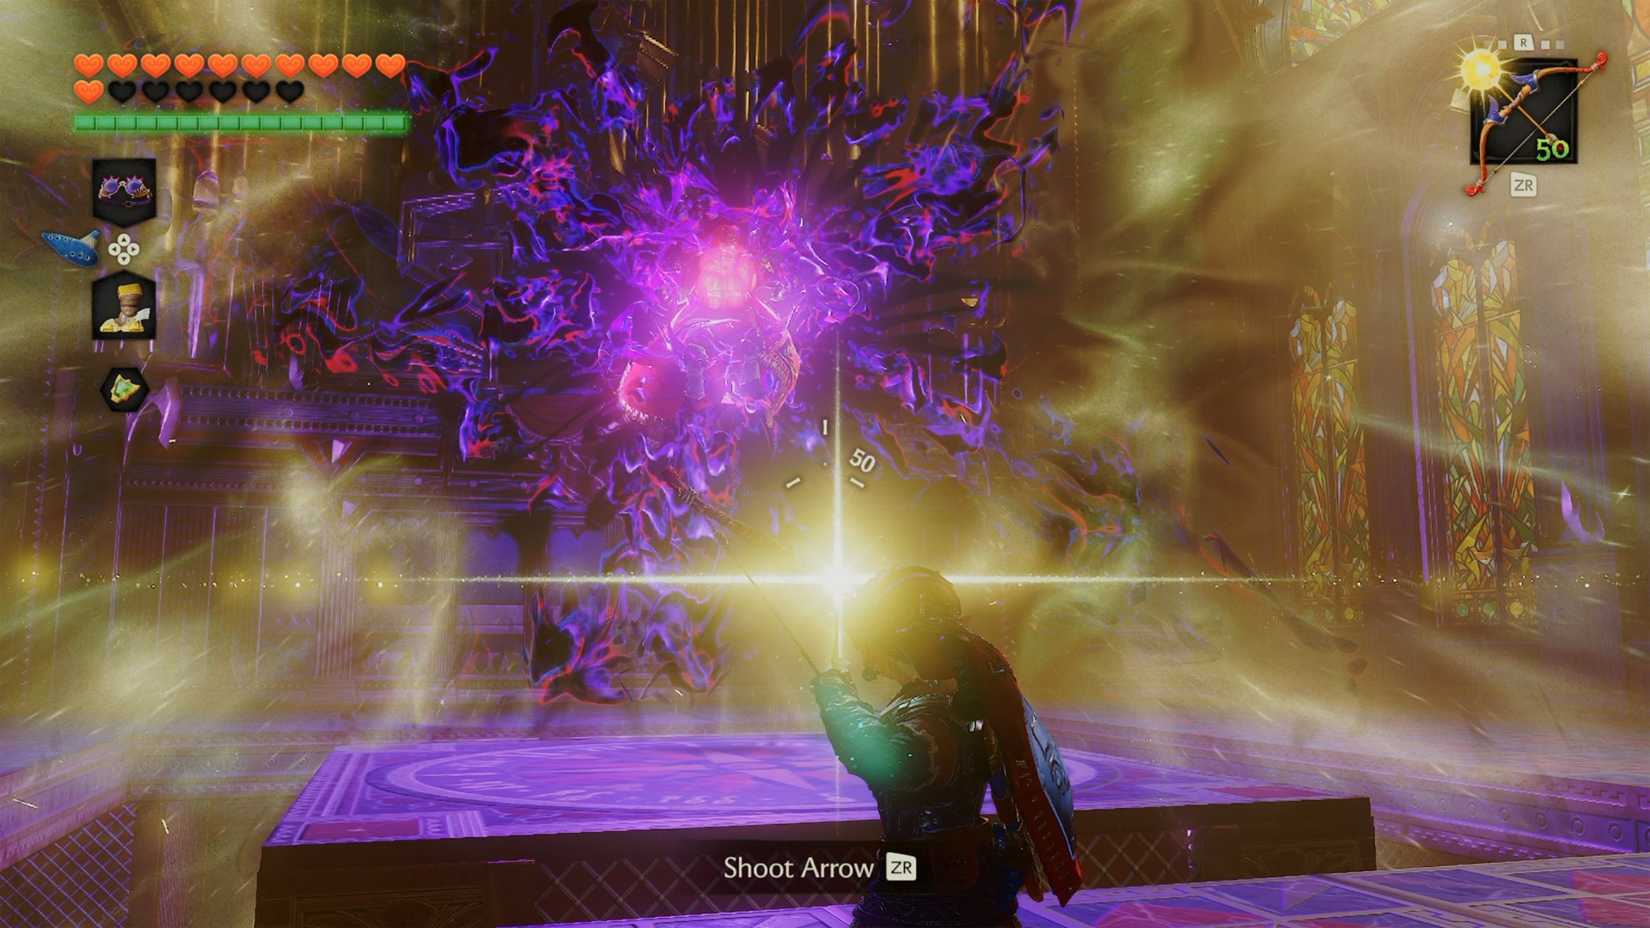 Image: Nintendo EPD/Nintendo via Polygon
After Ganondorf misses his return and gets hit by the orb, his chest will glow and emit dark energy, similar to the bulbs inside the rooms downstairs. Hit his chest with a Light Arrow, and he'll drop to the floor. Then, jump over to the central platform and hit Ganondorf as many times as you can.
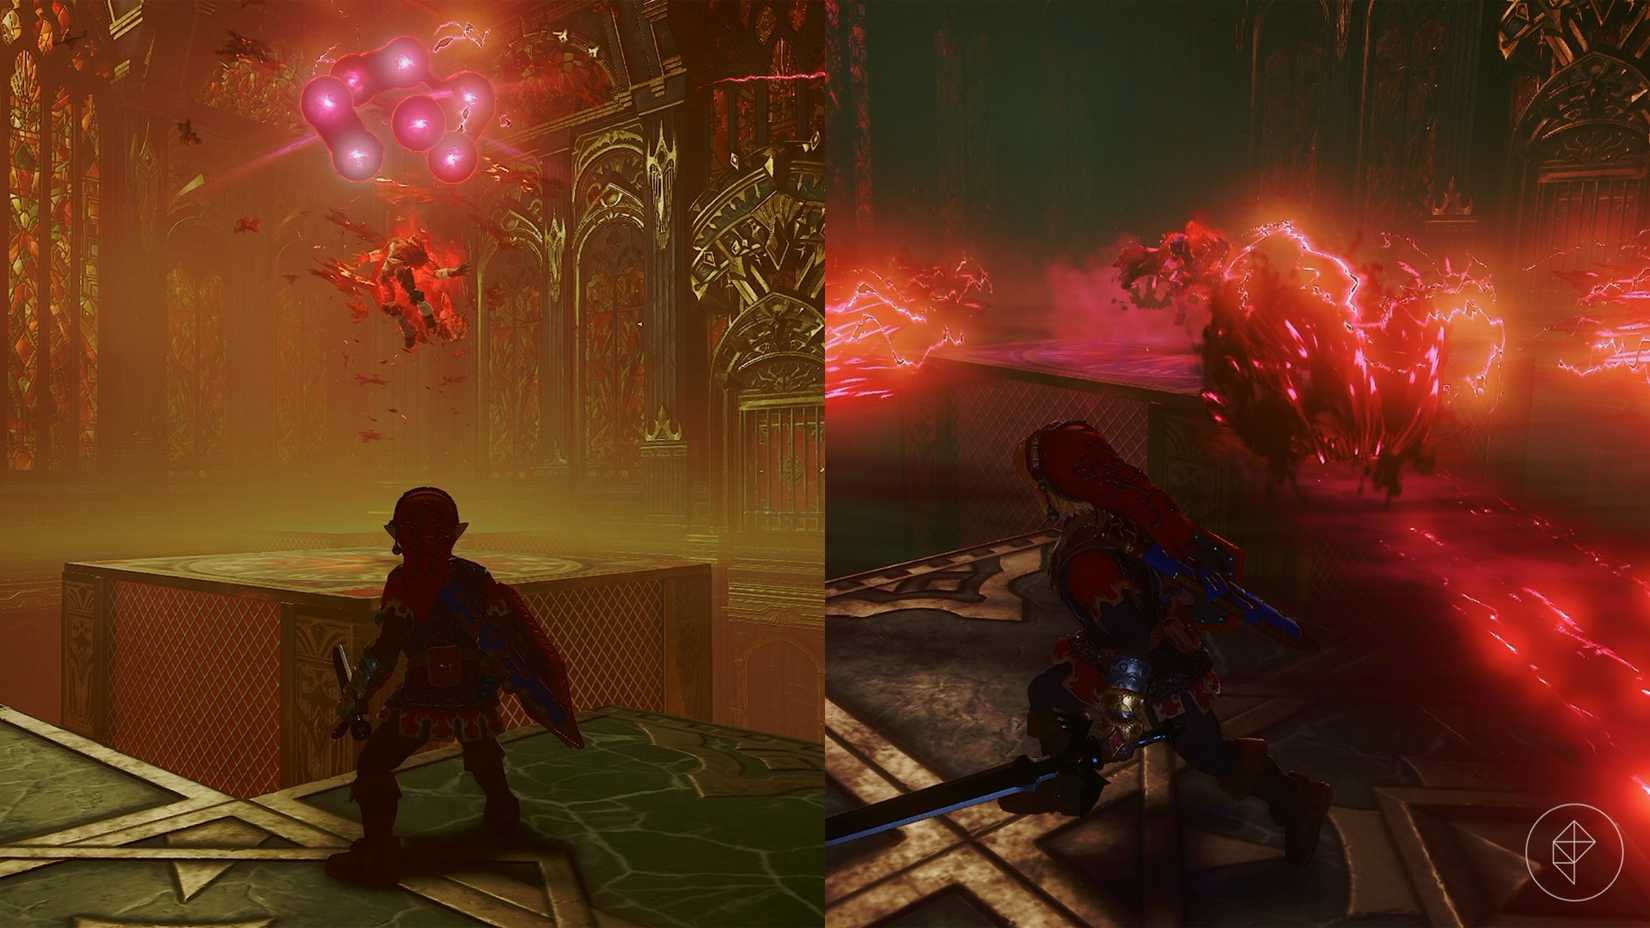
Ganondorf will slam onto the ground again, causing a few floor tiles to fall. He'll throw another ball at you, and the fight will start to repeat. However, your rallies with Ganondorf will get longer, and he'll incorporate new attacks:
 Graphic: Johnny Yu/Polygon | Source images: Nintendo EPD/Nintendo via Polygon
- Ganondorf will create a large red orb above him, and it'll split into multiple smaller orbs. Every orb will be launched at you at once. Stand close to the edge before he launches the orbs, and then move back with your shield up to block the incoming attacks. If any of the orbs touch the floor, that specific tile will fall.
- Ganondorf will gather energy in his fist, and slam onto the ground. A shockwave will launch outward as a result. Walk out of the shockwave's path to avoid taking damage.
Eventually, only the floor tiles in the corners of the room will be left standing. Continue to reflect the orbs at him and avoid his other attacks until he becomes vulnerable again. Longshot to the climbable wall on the center platform, and climb up to attack him. Repeat this process until you defeat him.
Part 9: Escaping Ganondorf's Castle
After you defeat Ganondorf, Zelda will be free, but the castle will begin to collapse. Run down the stairs with Zelda either past her or by her side, and she'll eventually unlock the the door at the bottom.
Take the path to the left and make sure to jump across the gaps in the floor. You'll eventually reach another locked door that Zelda will unlock. Inside, you'll face off against two Stalfos. Defeat them and Zelda will run on ahead. Follow her and Longshot onto the target to cross the gap with Zelda.
 Graphic: Johnny Yu/Polygon | Source images: Nintendo EPD/Nintendo via Polygon
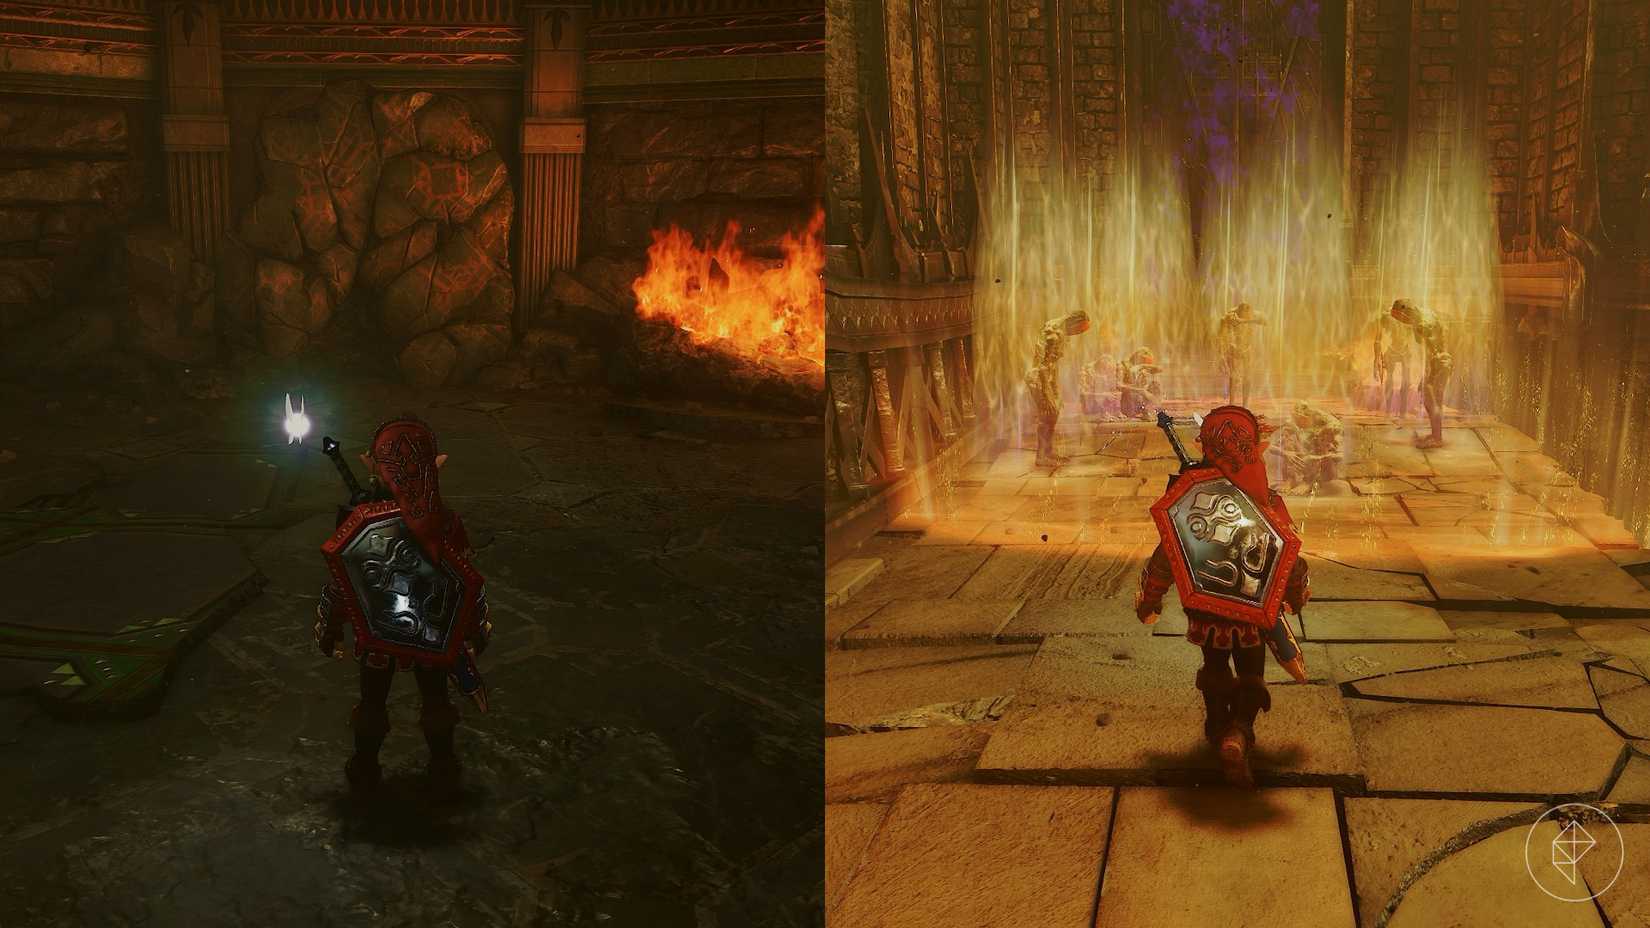
Continue into the next room, where the floor will break, and you'll drop into the room below. Zelda will hold off the incoming enemies, and you need to find a way out. Look away from Zelda, and you'll see a rock wall on the left side of the fire. Break it to reveal a way out. Follow the path, and you'll run into a bunch of ReDead. Zelda will lock them in place with her magic. Run into the middle of the pack and do a spin attack to defeat them.
Zelda will unlock the next door, and the tower will collapse. You'll successfully make it out, but there will be a loud noise in the distance. I wonder who it might be...
Part 10: Defeating Ganon
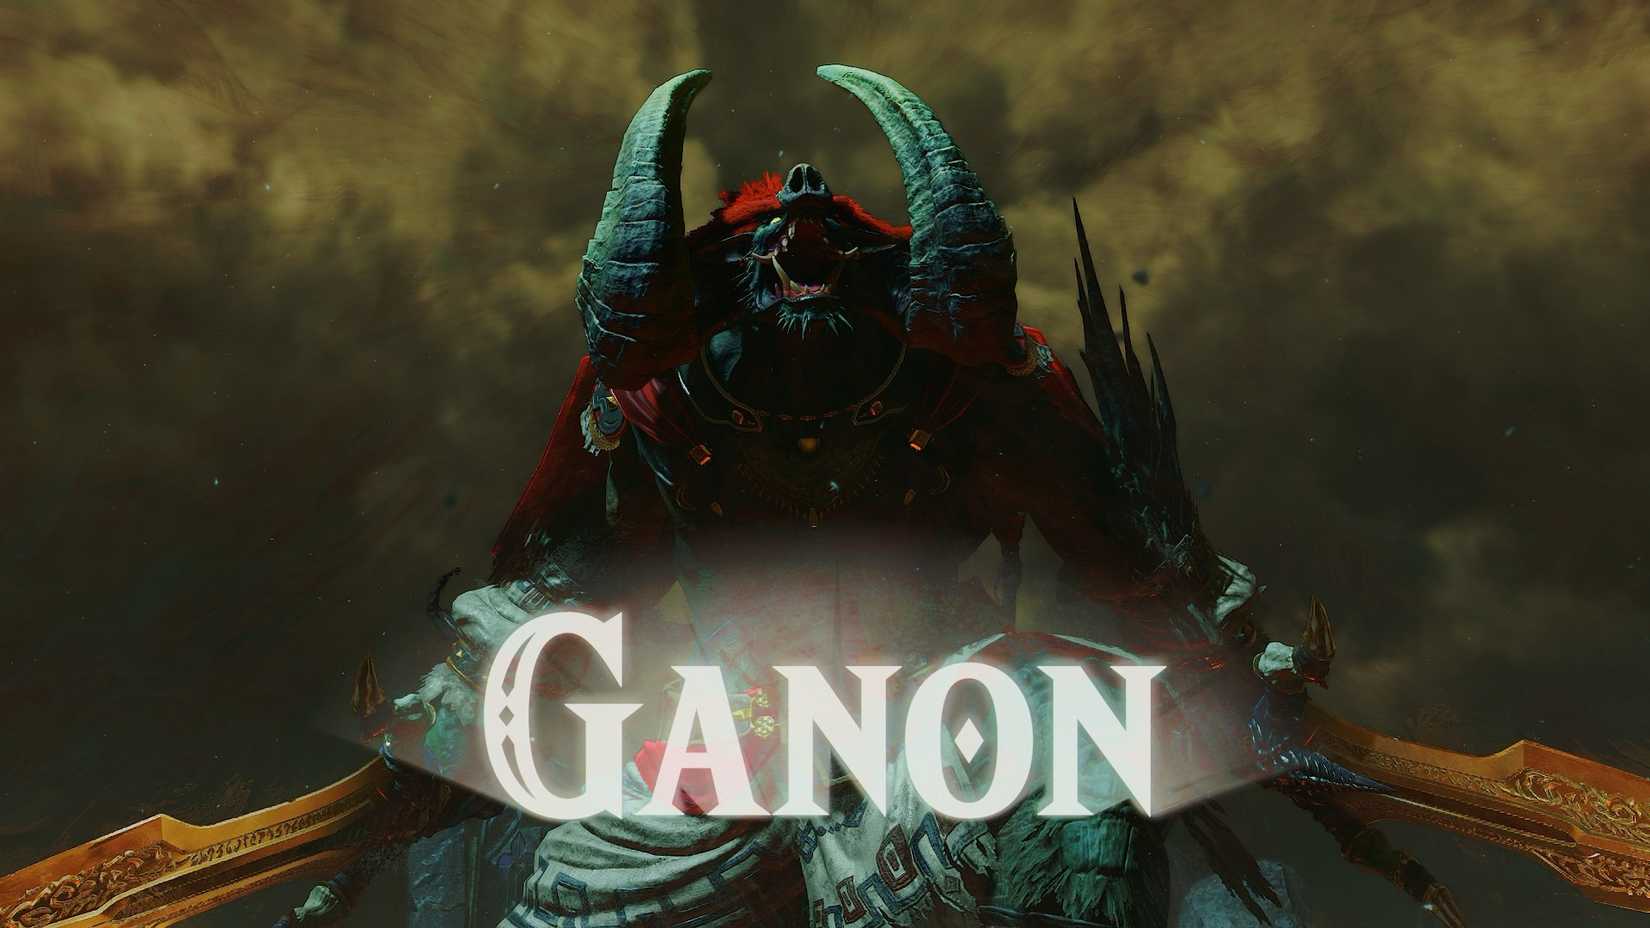 Image: Nintendo EPD/Nintendo via Polygon
Before you walk over to the pile of rubble, there are a few things you should know about the fight against Ganon:
- Navi is back, so you can target during this fight.
- You won't have the Master Sword for the first part of the fight, so you'll need to use your items instead. Be prepared to quickly swap between your items to deal as much damage as possible.
- If you're low on health, arrows, or magic power, bait Ganon's attacks into the walls around the arena.
For the first part of the fight, Ganon has one weak spot: his tail. As you don't have the Master Sword, you need to use your items to damage it, but you'll need to wait for Ganon to attack, which will give you enough time to retaliate.
Ganon has three different attacks to look out for:
- Ganon will lift one of his swords into the air, and slam it into the ground in front of him. Alternatively, Ganon may also just thrust his sword into the ground. His sword will get stuck in the ground and cause a rupture that will explode after a short period of time.
- Ganon will lift a sword to the side of his body, and sweep the ground in front of him.
- If you're behind Ganon, he'll jump into the air and slam onto the ground.
 Graphic: Johnny Yu/Polygon | Source images: Nintendo EPD/Nintendo via Polygon
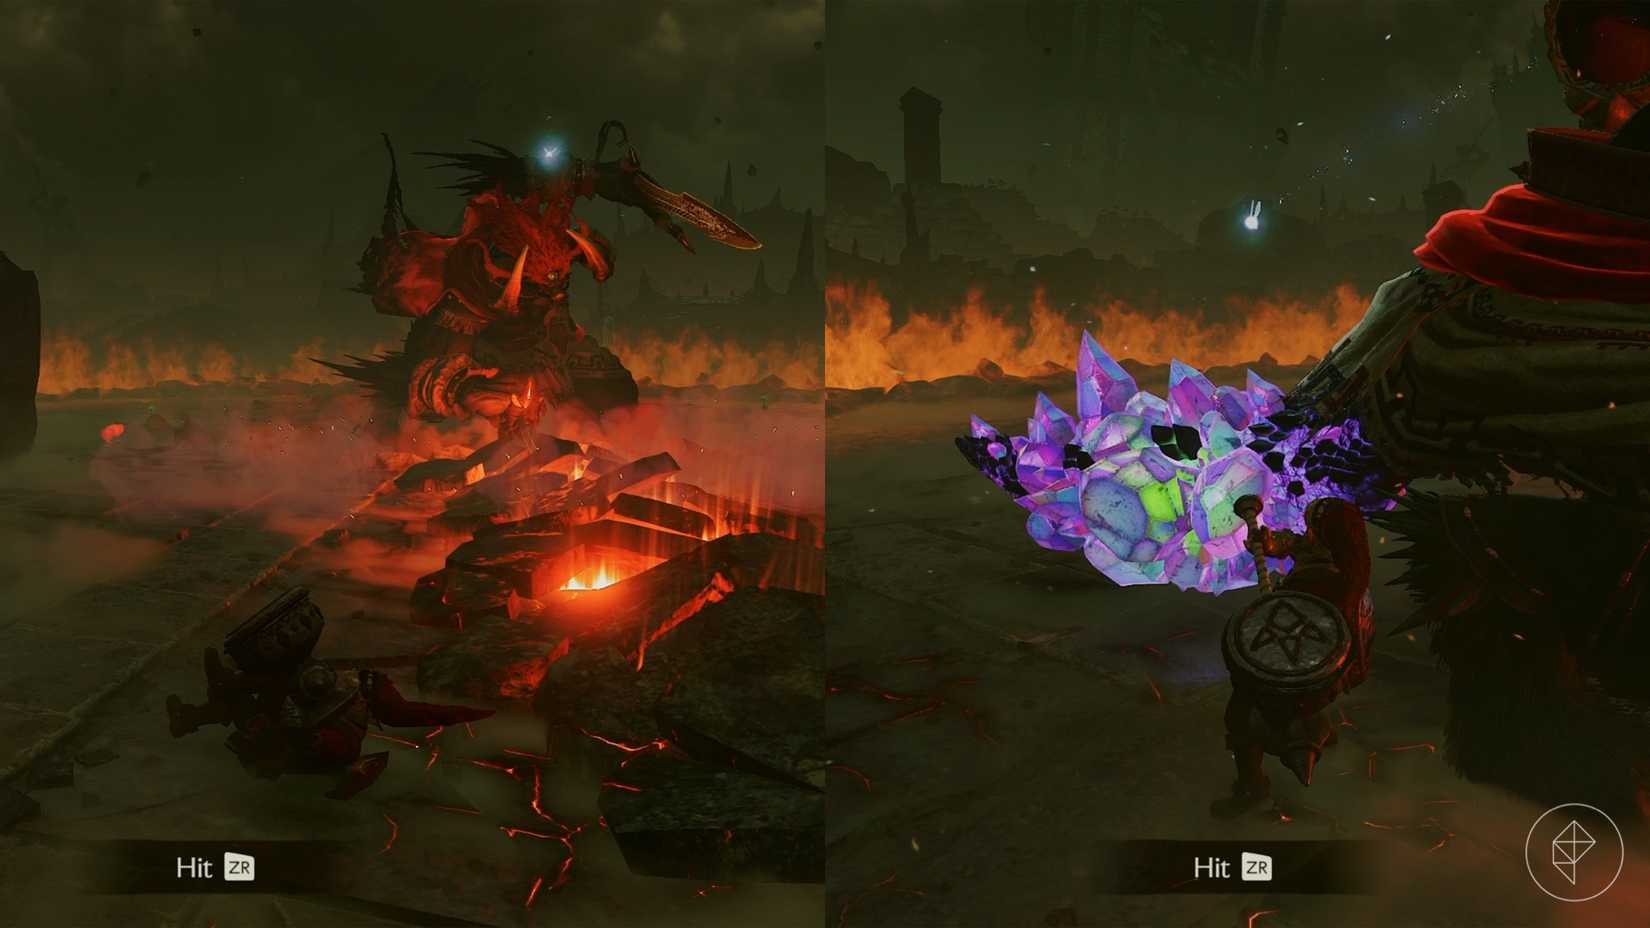
After Ganon slams his sword into the ground, his sword will be stuck in the ground for a bit. Quickly run behind him and attack his tail with the Megaton Hammer or the Fairy Bow.
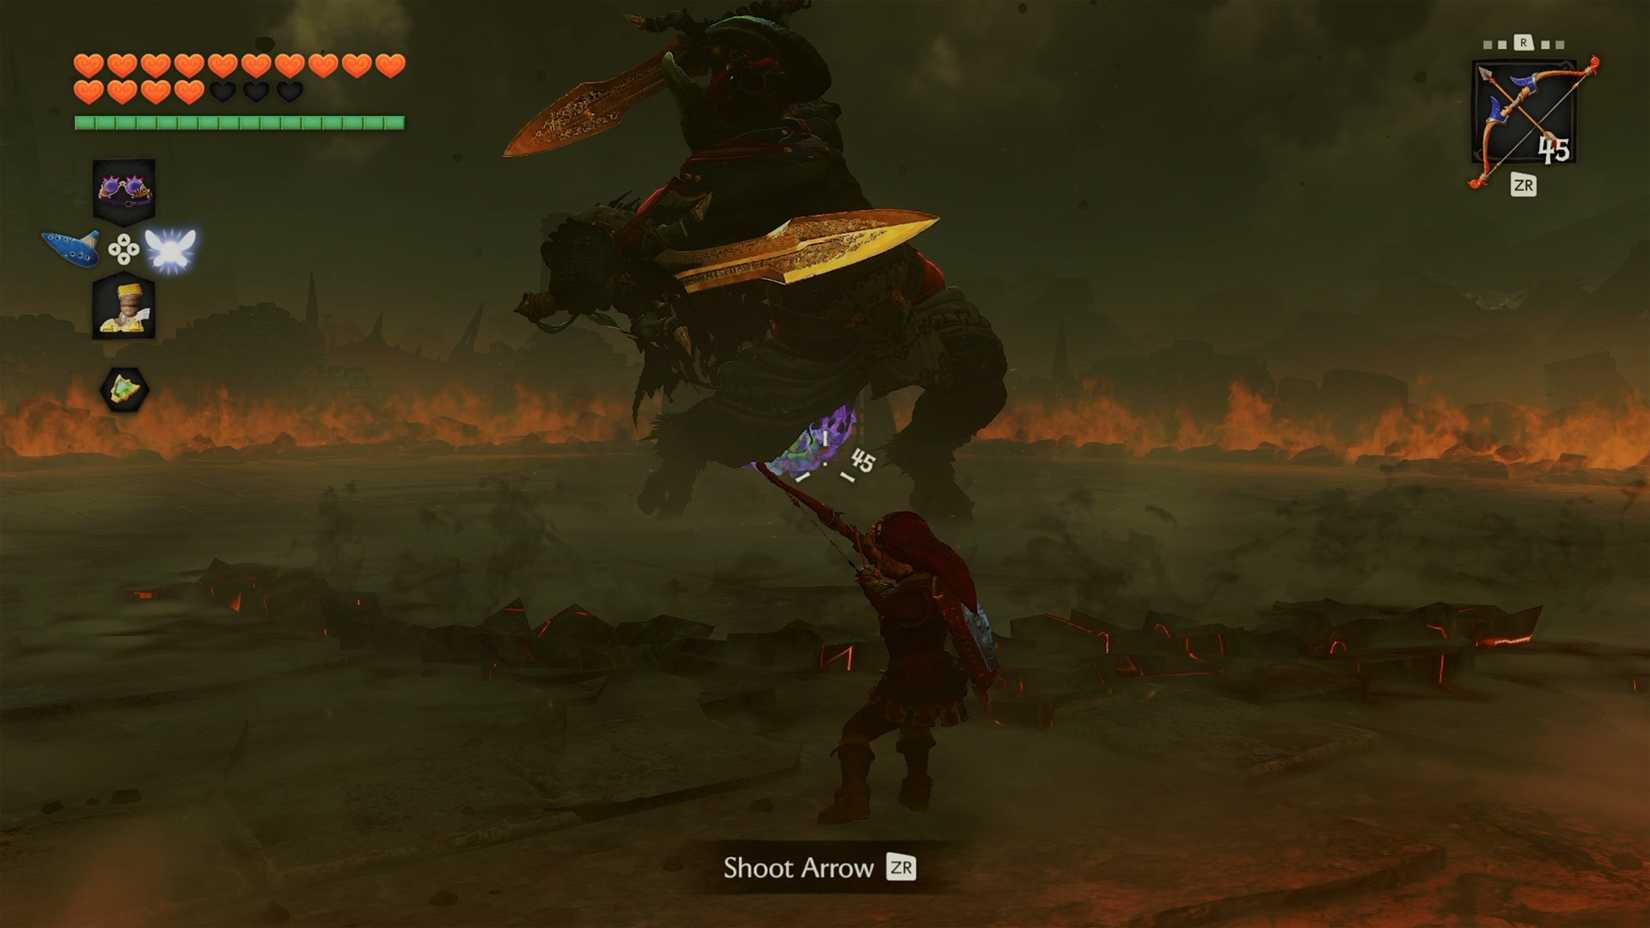 Image: Nintendo EPD/Nintendo via Polygon
When Ganon lifts his sword, you can shoot an arrow between his legs to hit his tail. You'll only have a brief moment to shoot the arrow though, so be ready! Alternatively, you can try to throw a Bombchu between his legs and have it explode next to his tail. But, this is a little tricky as you'll need to time it properly.
For Ganon's jumping attack, keep some distance to avoid getting smushed. Then, wait for his next move. Continue to attack his tail until it breaks, and the fight will move on to the second phase. Zelda will throw the Master Sword back to you, but Ganon will gain a third eye and his arms will start to glow. Fortunately, his third eye will close and you'll also gain a buff of your own as the Master Sword starts to glow.
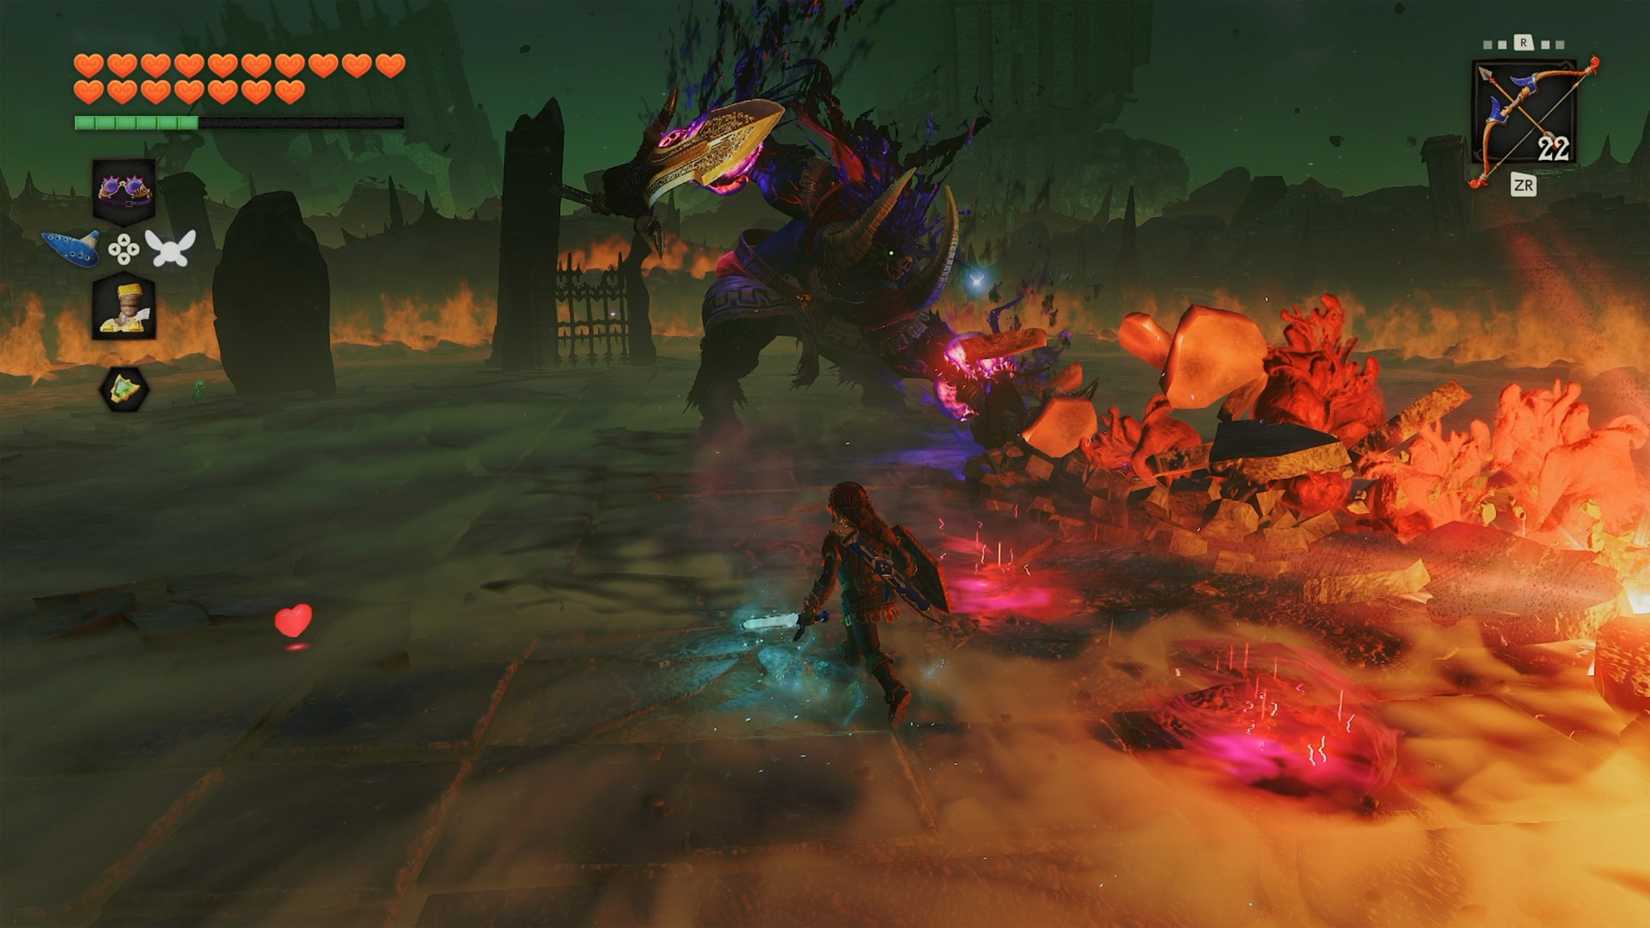 Image: Nintendo EPD/Nintendo via Polygon
For the second part of the fight, Ganon's attacks will largely mirror his attacks from the first phase, but this time, circles will form on the ground and lightning will strike in the same location shortly after. These circles will appear as he's winding up an attack and after he swings his sword, so make sure to avoid them.
 Graphic: Johnny Yu/Polygon | Source images: Nintendo EPD/Nintendo via Polygon
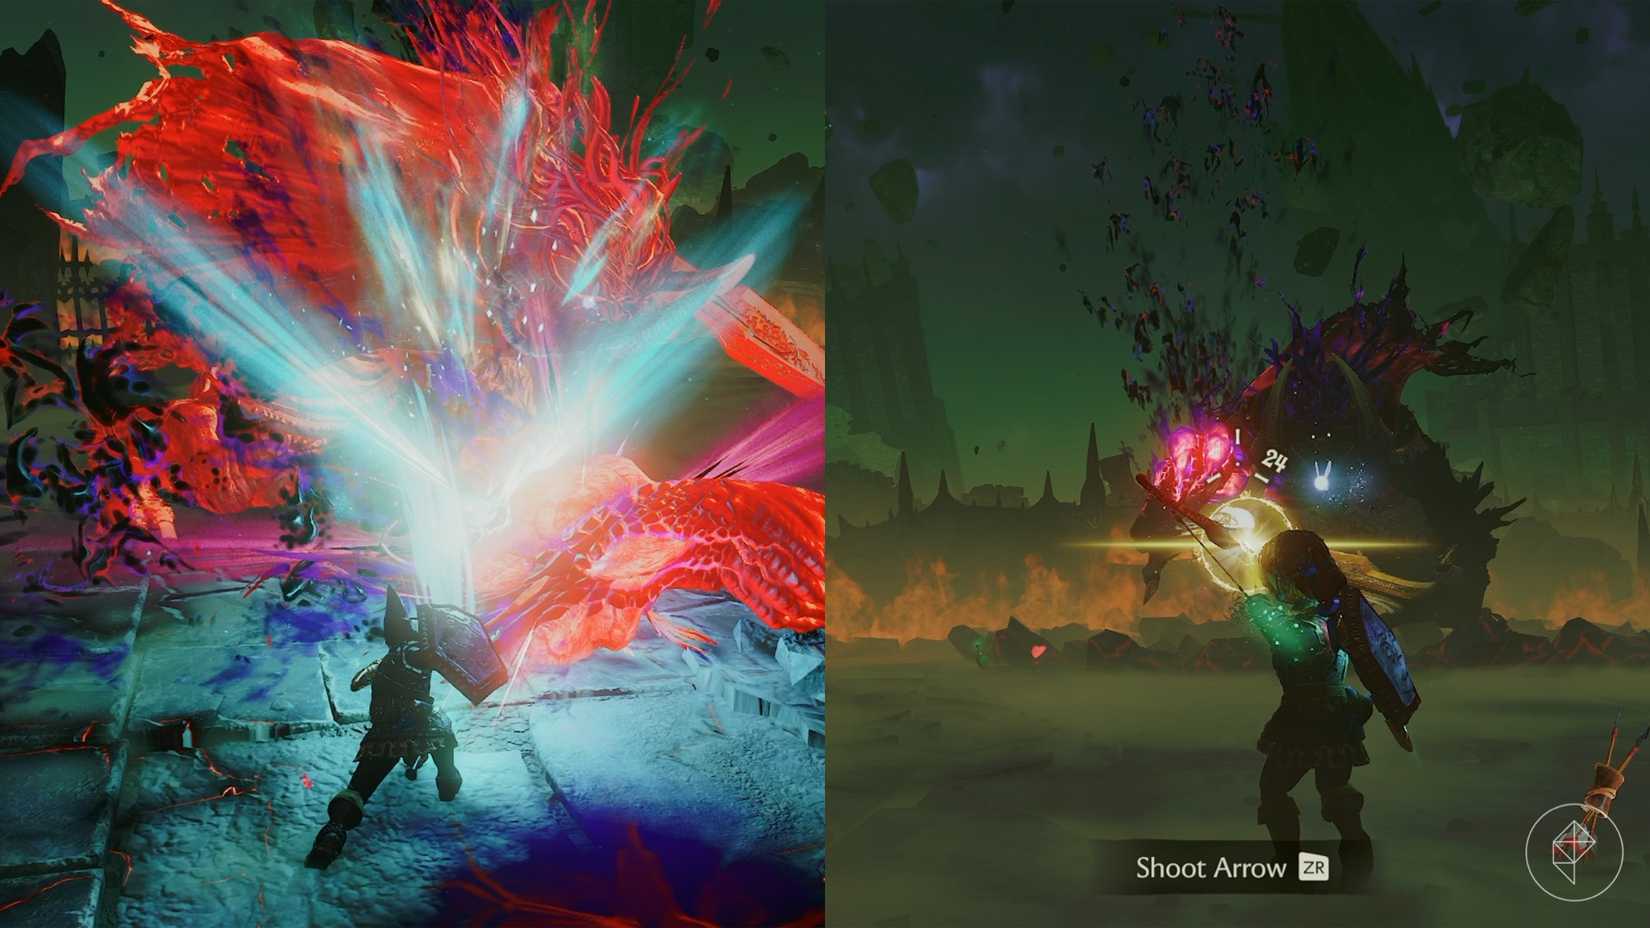
To deal damage to Ganon, you need to hit his arms with the Master Sword or Light Arrows. The only opportunity to use the Master Sword will be when Ganon's sword is stuck in the ground, so use your Light Arrows to damage his arms whenever you can. After you've dealt enough damage, his empowered arms will explode and revert to normal.
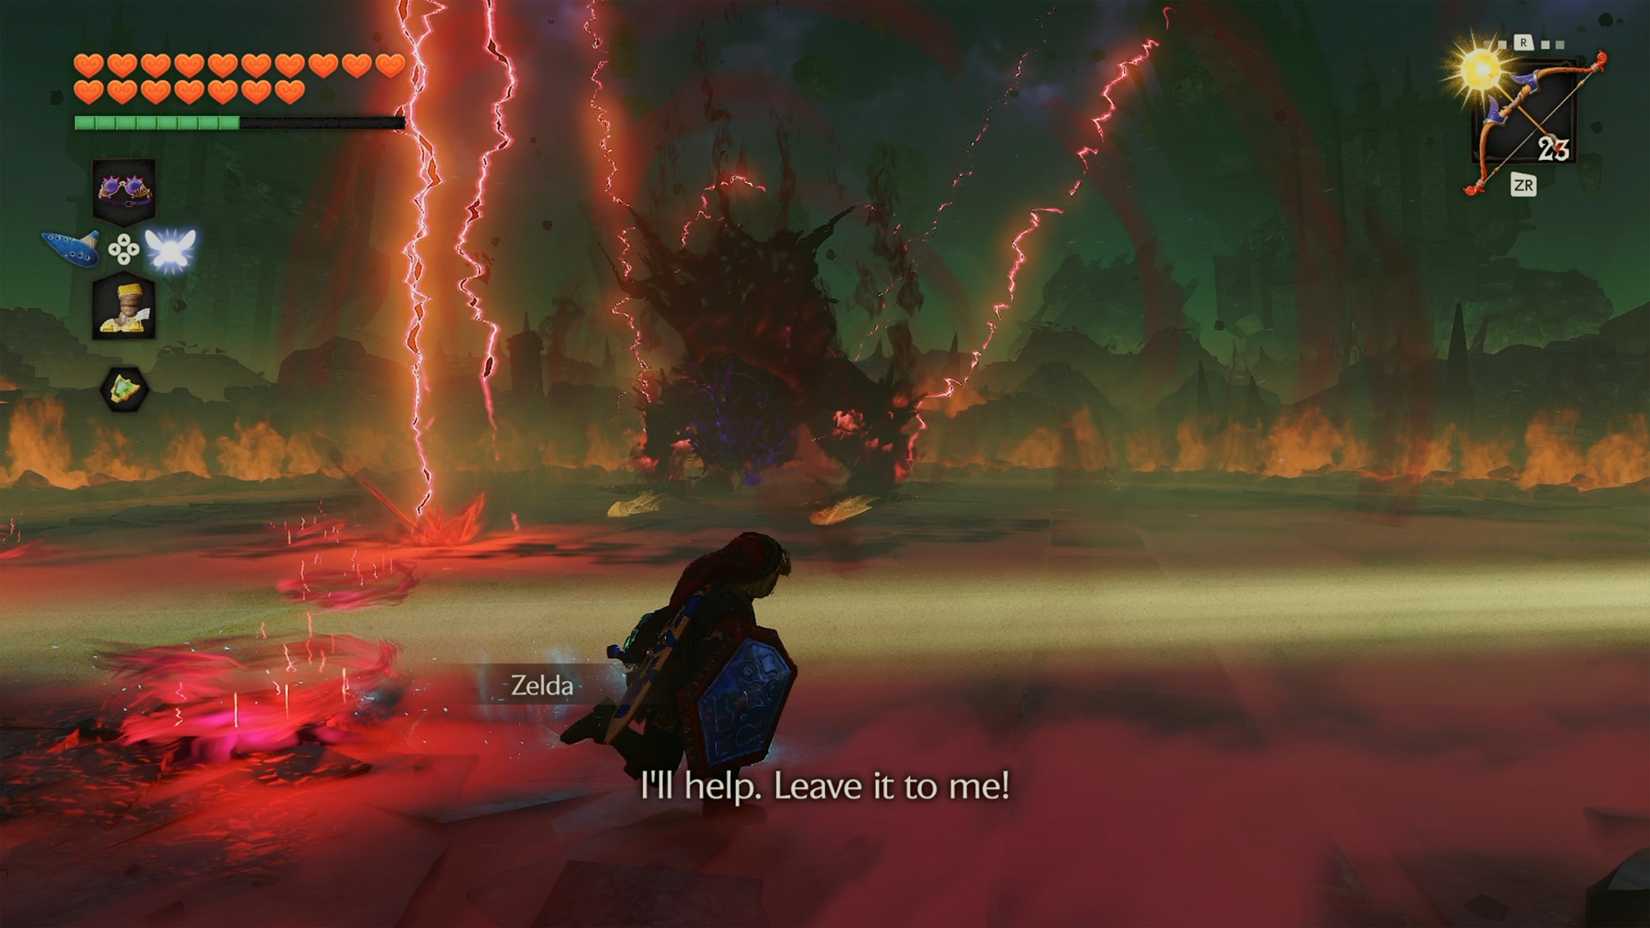 Image: Nintendo EPD/Nintendo via Polygon
Once both of Ganon's arms have been destroyed, he'll enshroud himself in dark energy and start charging at you. Keep your distance and constantly move around the edge of the arena to avoid getting hit. Eventually, Zelda will cast magic, causing Ganon's third eye to open.
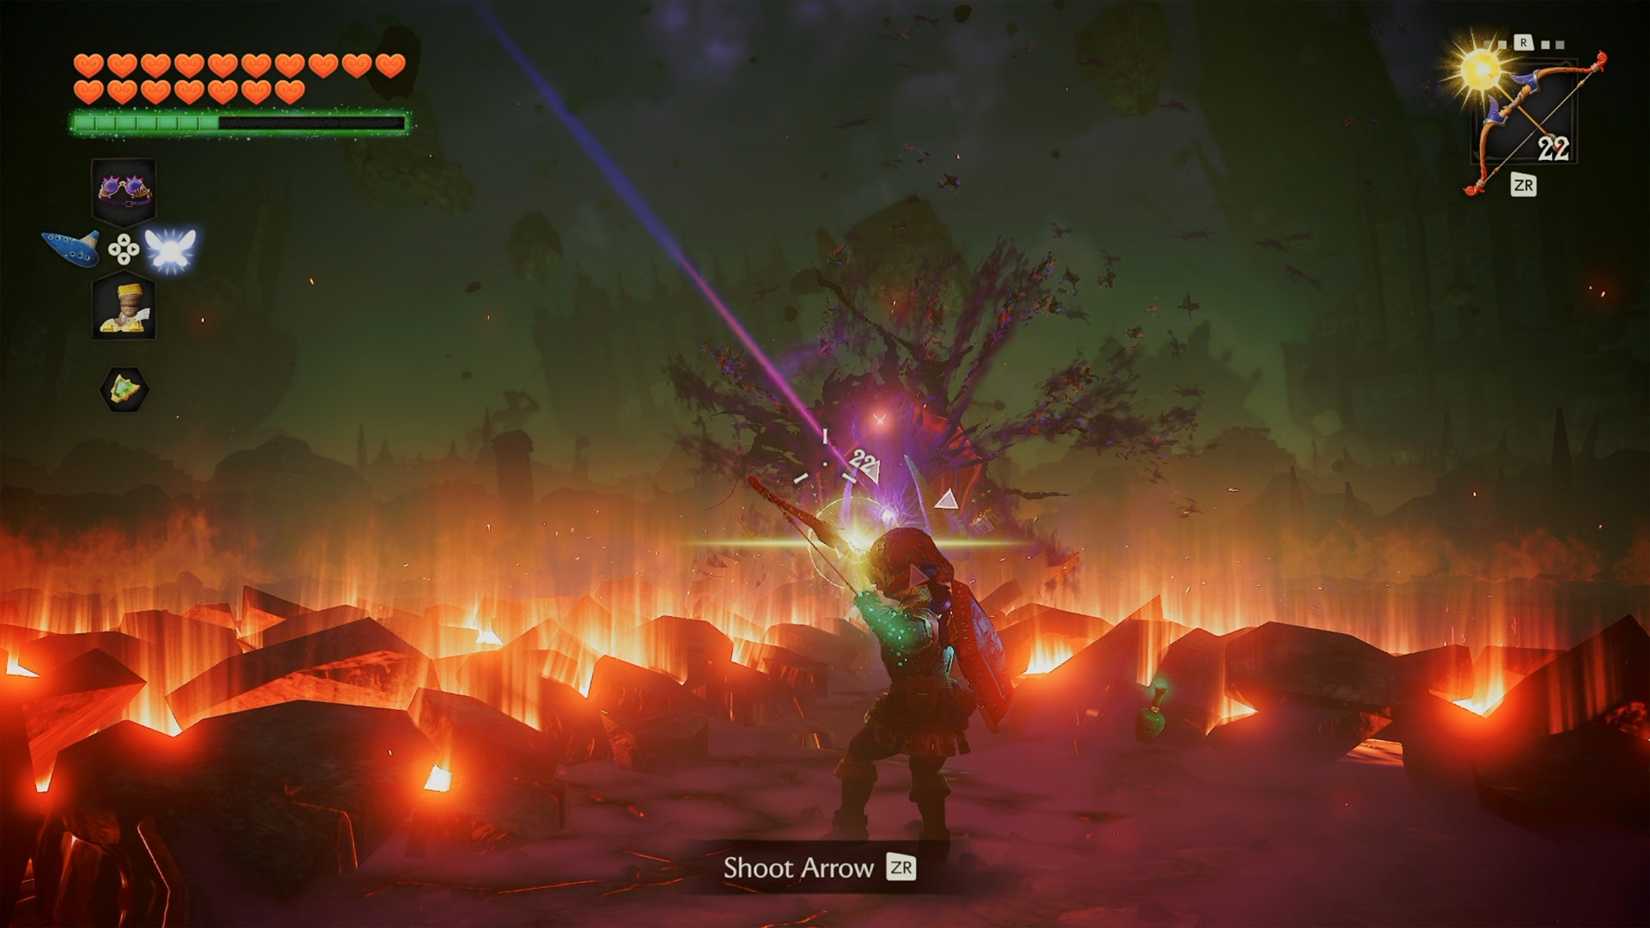 Image: Nintendo EPD/Nintendo via Polygon
For the third part of the fight, Ganon's attacks will still be roughly the same, but now when he slams the ground, multiple ruptures will form rather than just one. However, there's a lot of space between the ruptures, so you can stand between them and you'll be safe.
Ganon's weak spot during this phase is his third eye. Shoot a Light Arrow at it whenever you can. He'll cover it just before he's about to attack, but it'll be out in the open at every other moment. After you shoot his eye three times, he'll drop to the ground, and you can attack his eye with the Master Sword, defeating him.
The Sages will use their power to seal him away, and you'll finally defeat Ganon once and for all. Watch the rest of the cutscenes, and you'll reach the end of The Legend of Zelda: Ocarina of Time.
What's Your Reaction?
 Like
0
 Dislike
0
 Love
0
 Funny
0
 Wow
0
 Sad
0
 Angry
0










Comments (0)