

How to Make Flat Light Work for Your Portraits
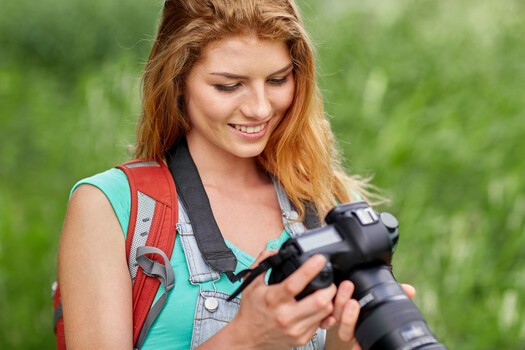
Flat light gets a bad reputation. The moment the sky turns from blue to a sheet of gray cloud, a lot of photographers pack up, assuming the good light is gone for the day. That instinct is backward. Soft, flat, overcast light is one of the most forgiving and flattering kinds of natural light there is, and the only reason it disappoints people is that they treat it as a finished product rather than a starting point. Learn a few simple ways to shape it, and a dull gray day becomes some of the easiest portrait light you will ever work with. This is about natural light specifically: no strobes, no flash, just the daylight you already have and a couple of inexpensive tools to bend it your way.
What Flat Light Actually Is
Flat light is light with very little direction or contrast. On an overcast day, the entire sky becomes one enormous, soft light source, the clouds acting like a giant diffuser spread across the whole scene. Light arrives on your subject from every direction at once, so shadows are weak and the difference between the bright and dark sides of a face nearly vanishes.
That softness is the gift and the problem at the same time. The gift is that the light is gentle and even, so skin looks smooth, there are usually far fewer hard-edged shadows, and your subject can hold a comfortable position without squinting into a harsh sun. The catch is that overcast light often arrives mostly from above, which can still leave the eye sockets dark and the catchlights weak, and the same evenness can leave a face looking dimensionless, a little dull, even lifeless, because the gentle gradients that normally give a face shape and depth are missing. Direction still matters for the shape of the face, the catchlights, and the background even when nobody is squinting. The whole craft of working in flat light is keeping the softness while controlling where the light comes from and where the shadows fall.
Find the Direction That Is Already There
Even on the flattest day, the light is not perfectly uniform. There is almost always a brightest area in the sky, often where the sun sits behind the cloud, and there are darker areas low to the ground and under any overhead cover. That subtle imbalance is direction, and the most reliable way to work flat light is subtractive: rather than piling on more light, you find the open sky, block the light you do not want, and let what remains come from a chosen direction.
The technique: Turn your subject so the brightest part of the sky falls on them from slightly to one side rather than flatly from the front. Even a faint difference in brightness across the face restores a sense of shape. The strongest version of this move is open shade: place the subject just inside the edge of cover, a doorway, an awning, the rim of a tree canopy, and have them face outward toward the open sky. The cover blocks the dull light spilling straight down from overhead, so the only light reaching the face comes in from the open side, which gives you soft light with real direction instead of flat light from everywhere at once. The key word is edge: push the subject too far back under the cover and the light goes top-heavy and muddy again and the eyes go dead, so keep them right at the lip of the shade where the open sky still reaches the face.
Use Negative Fill to Add Shape
This is the counterintuitive move that separates a flat snapshot from a sculpted portrait. Because flat light fills every shadow, the way to bring contrast back is not to add more light but to subtract it from one side. Placing something dark beside your subject absorbs the light hitting that side of the face, deepening the shadow there and recreating the gradient that gives a face dimension. This is called negative fill, and in flat light it is often more useful than adding light at all.
The technique: Position a dark surface, a black flag panel, a black jacket, the shadowed side of a wall, close to one side of the subject's face, just out of frame. The darker side will fall into gentle shadow while the other stays lit, and suddenly the face has a light side and a shadow side again. For this to work, the dark surface has to be reasonably large relative to the face or body and brought in close; a small black card held several feet away does almost nothing. Small adjustments to how close the dark surface sits control exactly how much shape you get.
Watch the Background and the Catchlights
Two quick checks make a disproportionate difference in flat light. The first is the background: because overcast light is so even, a bright patch of blown-out sky or a busy backdrop will compete with your subject more than it would in directional light, so position your subject against something cleaner and not much brighter than their face. Flat light also flattens the separation between subject and background, since there are fewer highlights and shadows to set them apart, so choose a darker or more distant background and open your aperture to throw it out of focus, keeping the whole frame from going tonally mushy. Moving the subject farther from the background does as much as aperture here, sometimes more, since the extra distance softens the backdrop and adds separation even with a modest lens or when you have had to stop down. The second check is the eyes. Flat light can leave eyes looking dark and dull, so make sure something is putting a catchlight in them, whether that is the brightest patch of sky reflected as you angle the subject toward it, or a reflector bouncing light back up into the face.
Mind the Color and the Exposure
Two technical things bite people in flat natural light. The first is color. Overcast light skews cool and blue, and nearby surfaces bounce their own color onto the skin, grass throws green, brick throws red, dense foliage can leave a face looking muddy. Set a deliberate white balance when consistency across a set matters, or shoot raw and correct carefully later, and either way watch what your subject is standing next to so a strong color cast does not contaminate the skin in the first place. The second is exposure. Flat overcast light is often dim, which pushes you toward slower shutter speeds and higher ISO than a sunny day would, so keep an eye on your shutter speed to avoid motion blur, raise the ISO when you need to, and expose for the face rather than the much brighter sky, accepting some background brightness or a clipped sky if necessary, as long as the blown area stays small and does not eat into hair and skin edges or pull the eye off the subject.
The Single Most Useful Tool: The 5-in-1 Reflector
If you do one thing to take control of natural light, carry a 5-in-1 reflector. It is the most cost-effective light-shaping tool there is for working outdoors, it needs no batteries or power, and it can be handheld or clamped to a stand, though precise placement while you shoot is far easier with an assistant or a clamp than juggling it yourself. One real-world warning: a large reflector outdoors acts like a sail, so in any wind you will want a clamp, a light stand with a sandbag, or a second pair of hands, or it will fold, fly, or pull its stand over. It folds down small enough to live in any bag. A 5-in-1 reflector is built around a translucent diffusion disc with a reversible zippered sleeve that wraps it in four different surfaces, giving you five tools in one. Here is what each one does in natural light.
White is the surface for adding life rather than shape. It bounces a soft, neutral fill back into the face, gently lifting the shadows under the eyes and chin and, most valuably, putting a catchlight in the eyes, without changing skin tone or looking obvious. Reach for it when the eyes look dull or the under-eye shadows are too heavy, but use it with restraint, because too much frontal white fill makes an already flat face even flatter. Keep it slightly below face or chest level, angled up toward the eyes, and bring it reasonably close since the white side is not very bright, but avoid lighting from so low that you create an unnatural up-light look.
Silver reflects much more light than white for a brighter, punchier, higher-contrast fill. It is useful when the day is very dim or when you need to compete with a bright background, but use it carefully in flat light, since it can be too intense and create highlights harder than the soft ambient light around them. Keep it farther back than the white side. This is the place to remember the larger rule: fill should stay subtle, because too much bounced light from the front, white or silver, simply erases the shape you just worked to build with direction and negative fill.
Gold bounces a warm, golden tone into the skin for a sun-kissed look the gray sky is not providing. Use it sparingly, since the warm cast can look artificial against cool overcast light and is easy to overdo.
Black does not add light at all; it is your negative fill in a single panel, and on a flat day it is just as important as the white side, often more so. Where white adds life to the eyes, black adds shape to the face. Hold the black side close to one side of the face to absorb the light hitting it and deepen the shadow there, which rebuilds the light-side-to-shadow-side gradient that flat light erases. This is the surface most beginners ignore and the one that most directly fixes flatness, so on an overcast day it is often the first surface to reach for, not the last.
The translucent diffuser, the disc at the center once the sleeve is removed, is for the opposite situation: when the sun does come out, hold it between the sun and your subject to turn harsh, direct light into the soft light an overcast sky gives you for free. It works best held close to the subject and only softens the area it covers, so a small disc suits a head-and-shoulders portrait but will not soften a full-body shot. It also cuts the light passing through it by a stop or two, so expect to open up, slow down, or raise ISO to compensate. It is a portable cloud, which is what lets a single 5-in-1 both create soft light when the sun is harsh and shape it when the sky is flat.
Putting It Together
A simple, repeatable flat-light setup looks like this: put the subject in open shade facing the open sky so the light has direction, set a clean, darker background behind them and open the aperture to separate them from it, then bring the black side of the reflector in on one side for negative fill so the face has shape. If the eyes still need lift after that, flip to the white side, or add a second reflector or a white card on the opposite side so you can hold the shadow on one side and lift the eyes on the other at the same time. That is a flattering portrait built almost entirely from soft daylight and a folding disc or two, and notice that most of the work is subtraction and placement, not adding light.
The deeper lesson is that flat light is not lesser light. It is raw material with the harshness already removed, which means most of the hard work is done for you and what remains is the easy, controllable part: deciding where the light comes from and where the shadows fall. Once you stop seeing an overcast sky as a problem and start seeing it as a giant softbox you did not have to pay for, those gray days become some of your most productive.
Shaping soft light well is a skill worth developing beyond a single technique. To go deeper on light specifically for faces, Illuminating the Face: Lighting for Headshots and Portraits by Peter Hurley breaks down how light direction and quality sculpt a portrait, which is exactly what flat light asks you to control, and for the wider outdoor toolkit, The Well-Rounded Photographer: 8 Instructors Teach 8 Genres of Photography shows photographers adapting to whatever light a location hands them.
What's Your Reaction?
 Like
0
Like
0
 Dislike
0
Dislike
0
 Love
0
Love
0
 Funny
0
Funny
0
 Wow
0
Wow
0
 Sad
0
Sad
0
 Angry
0
Angry
0







Comments (0)